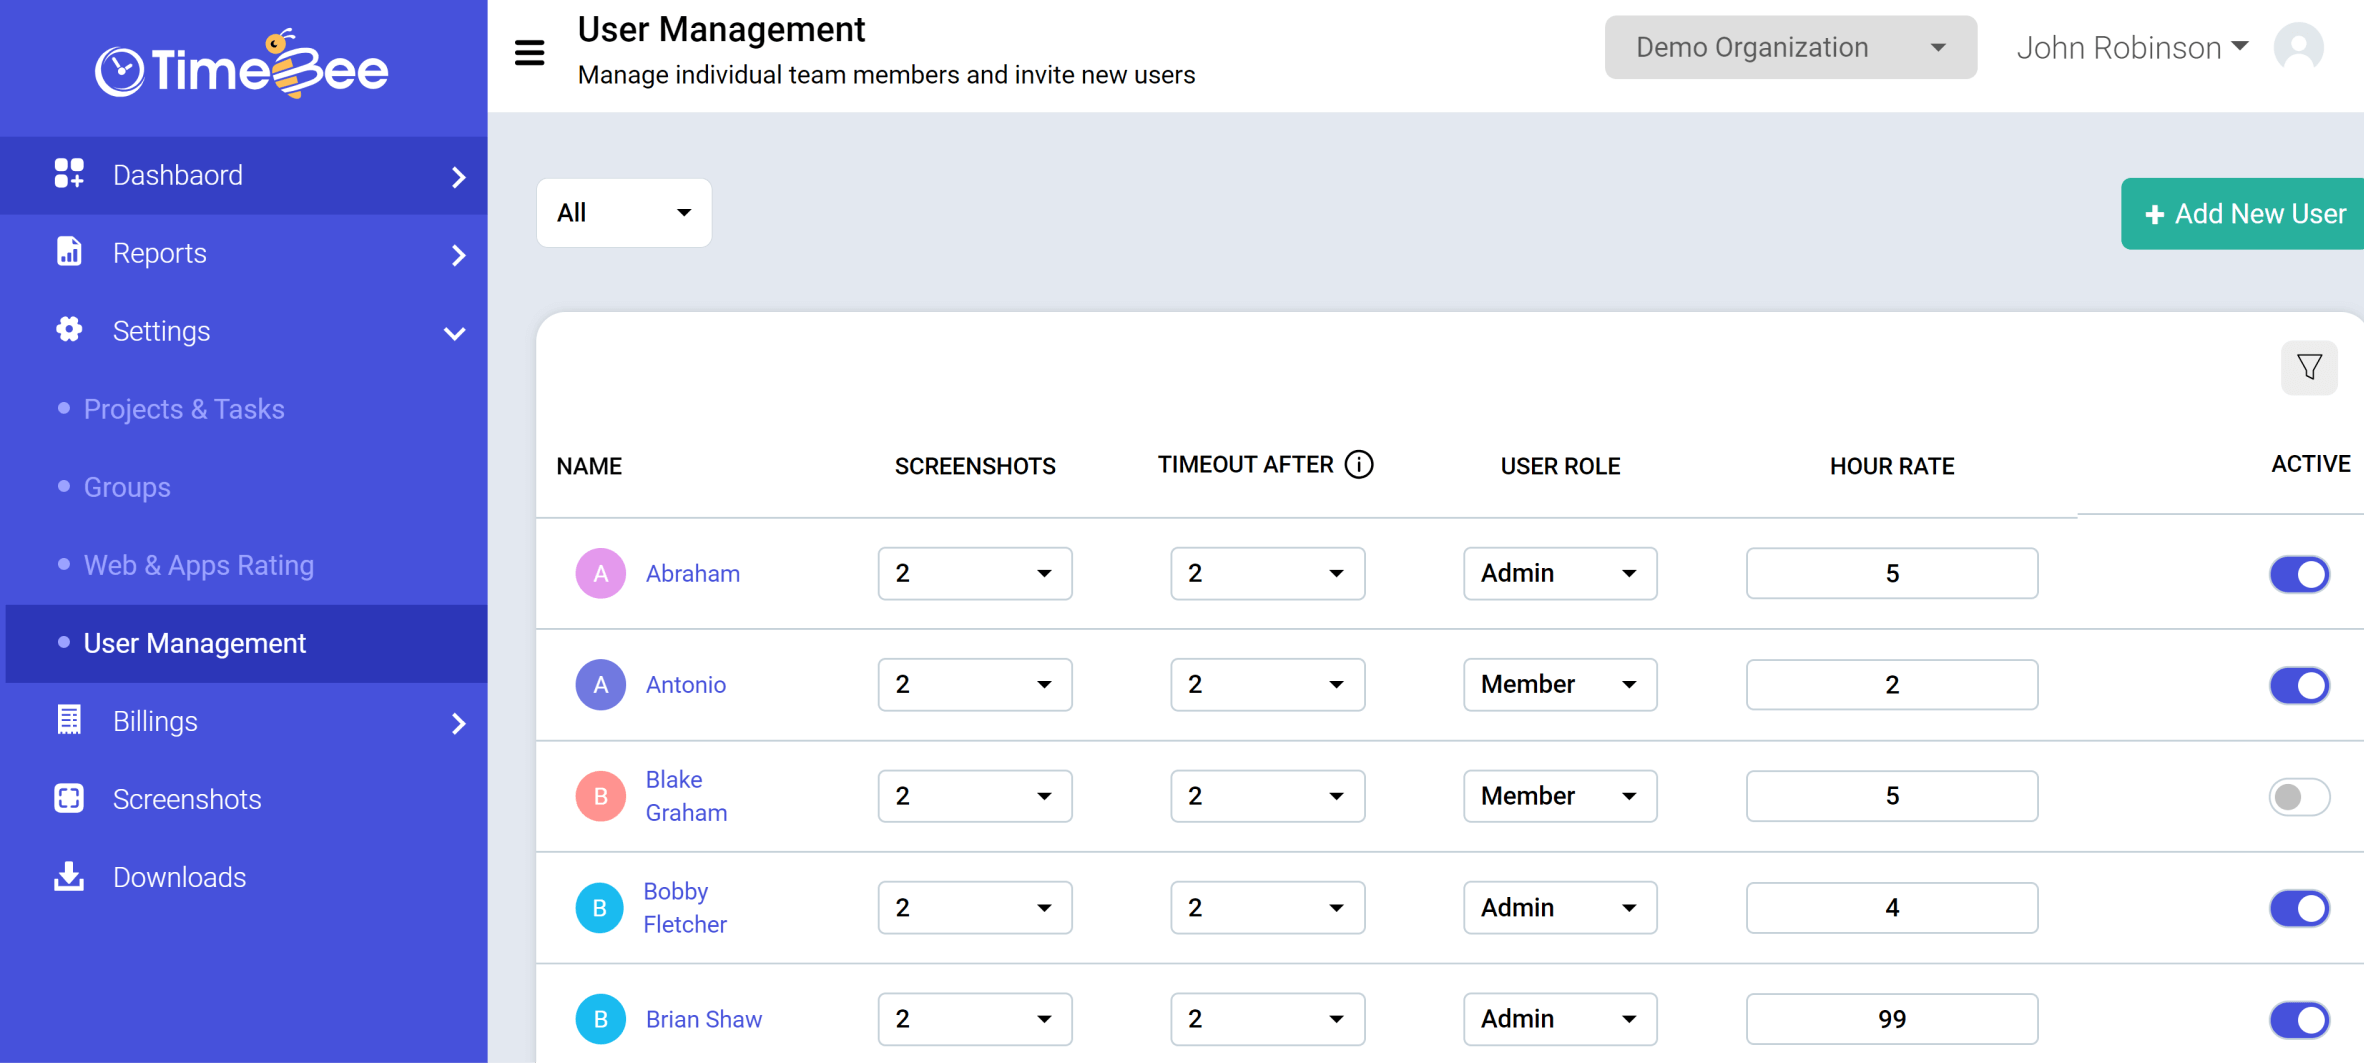
User Management serves as a control panel for managers to oversee the workforce. This TimeBee feature allows you to invite new users and customize settings like screenshot frequency, timeouts, user roles, per-hour rate, and activate/deactivate users.
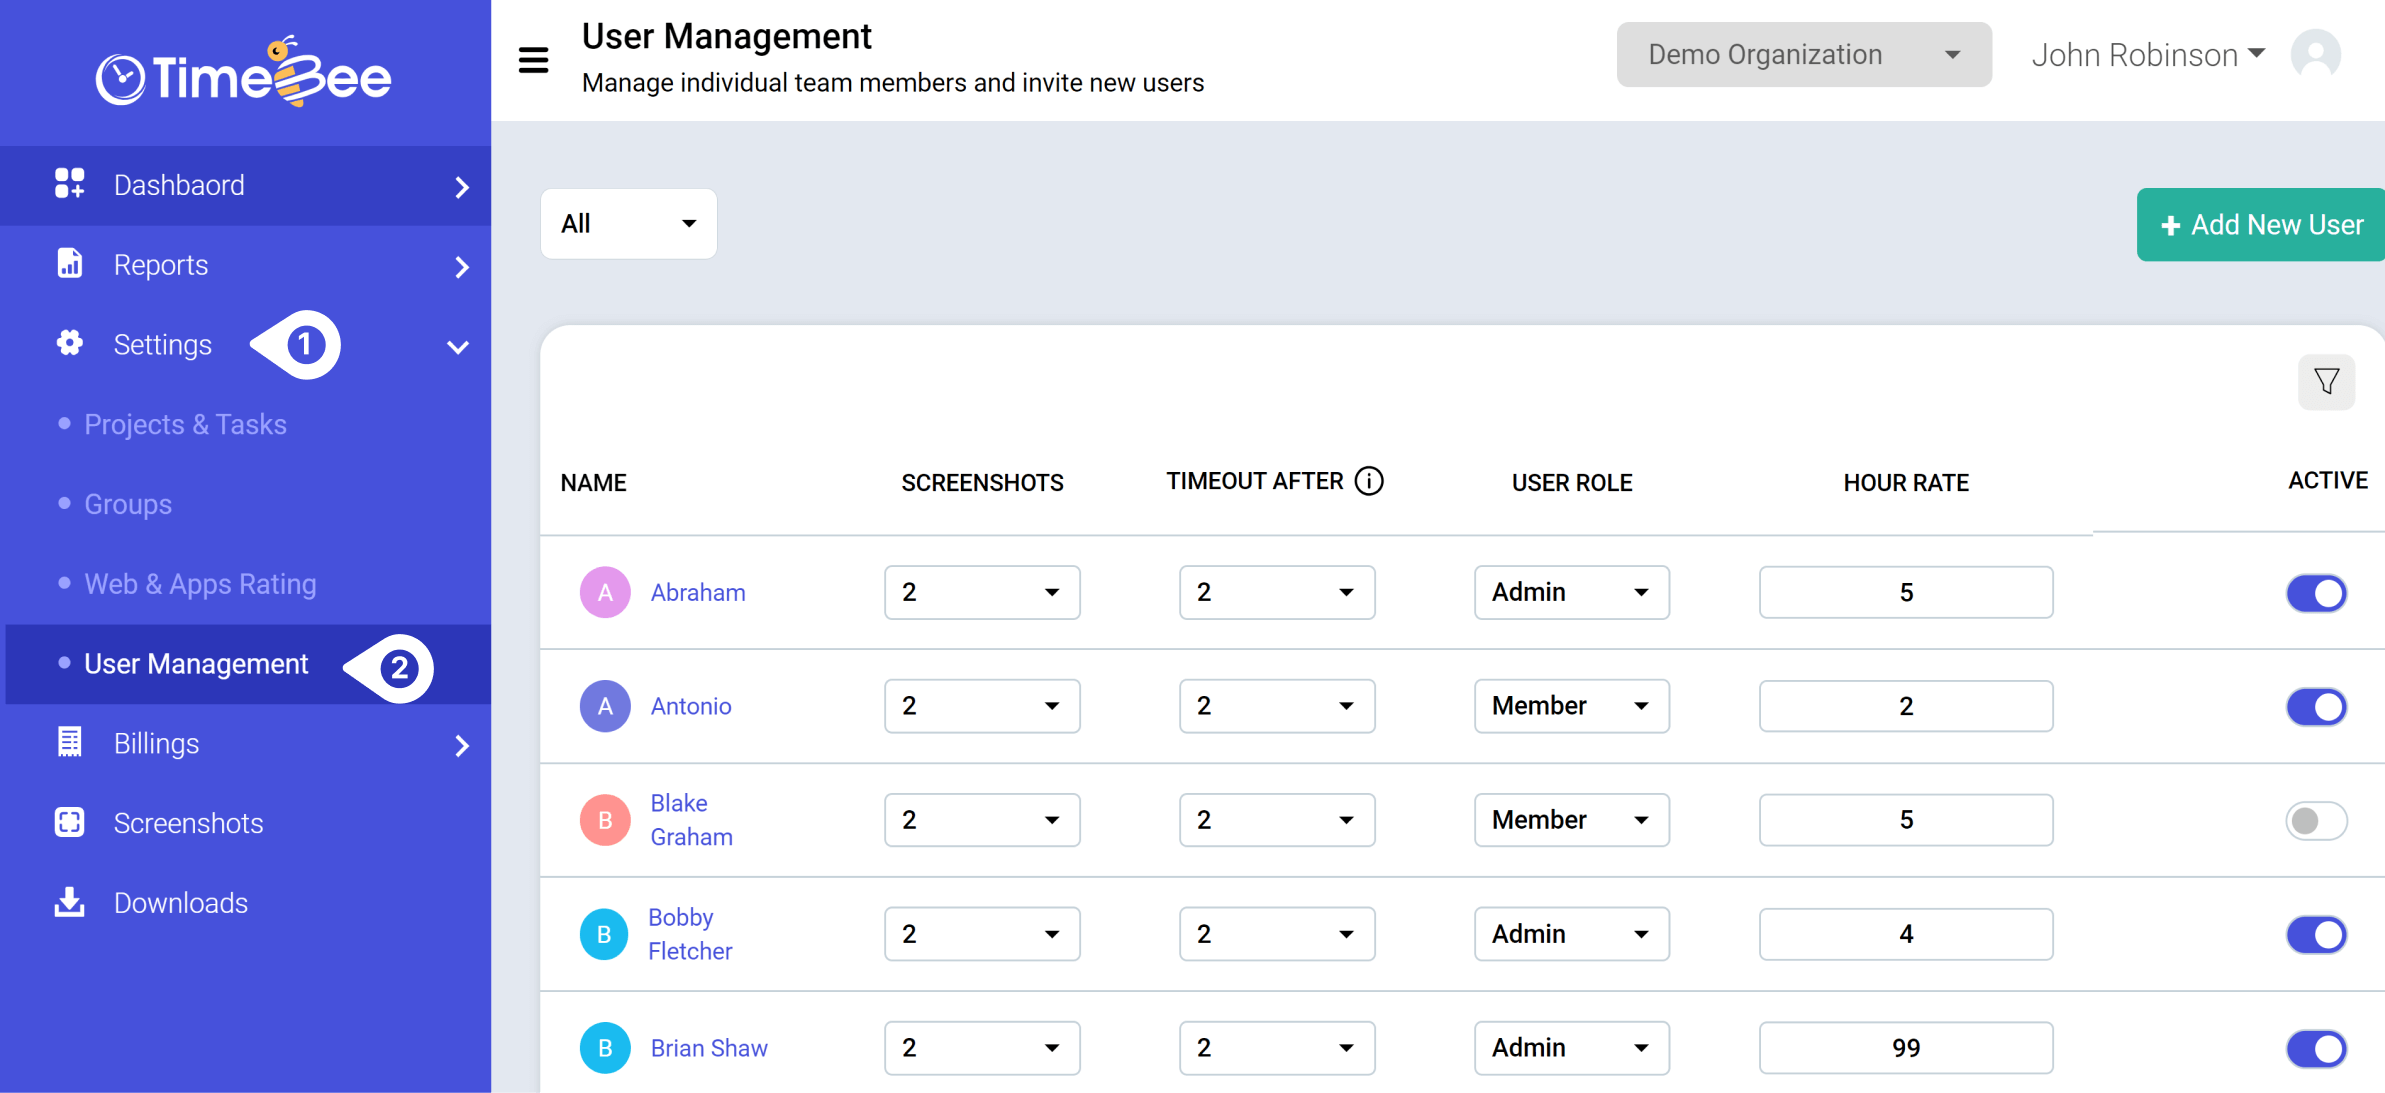
To access User Management, click on “Settings” from the sidebar of the web app. Next, select “User Management” from the drop-down menu.
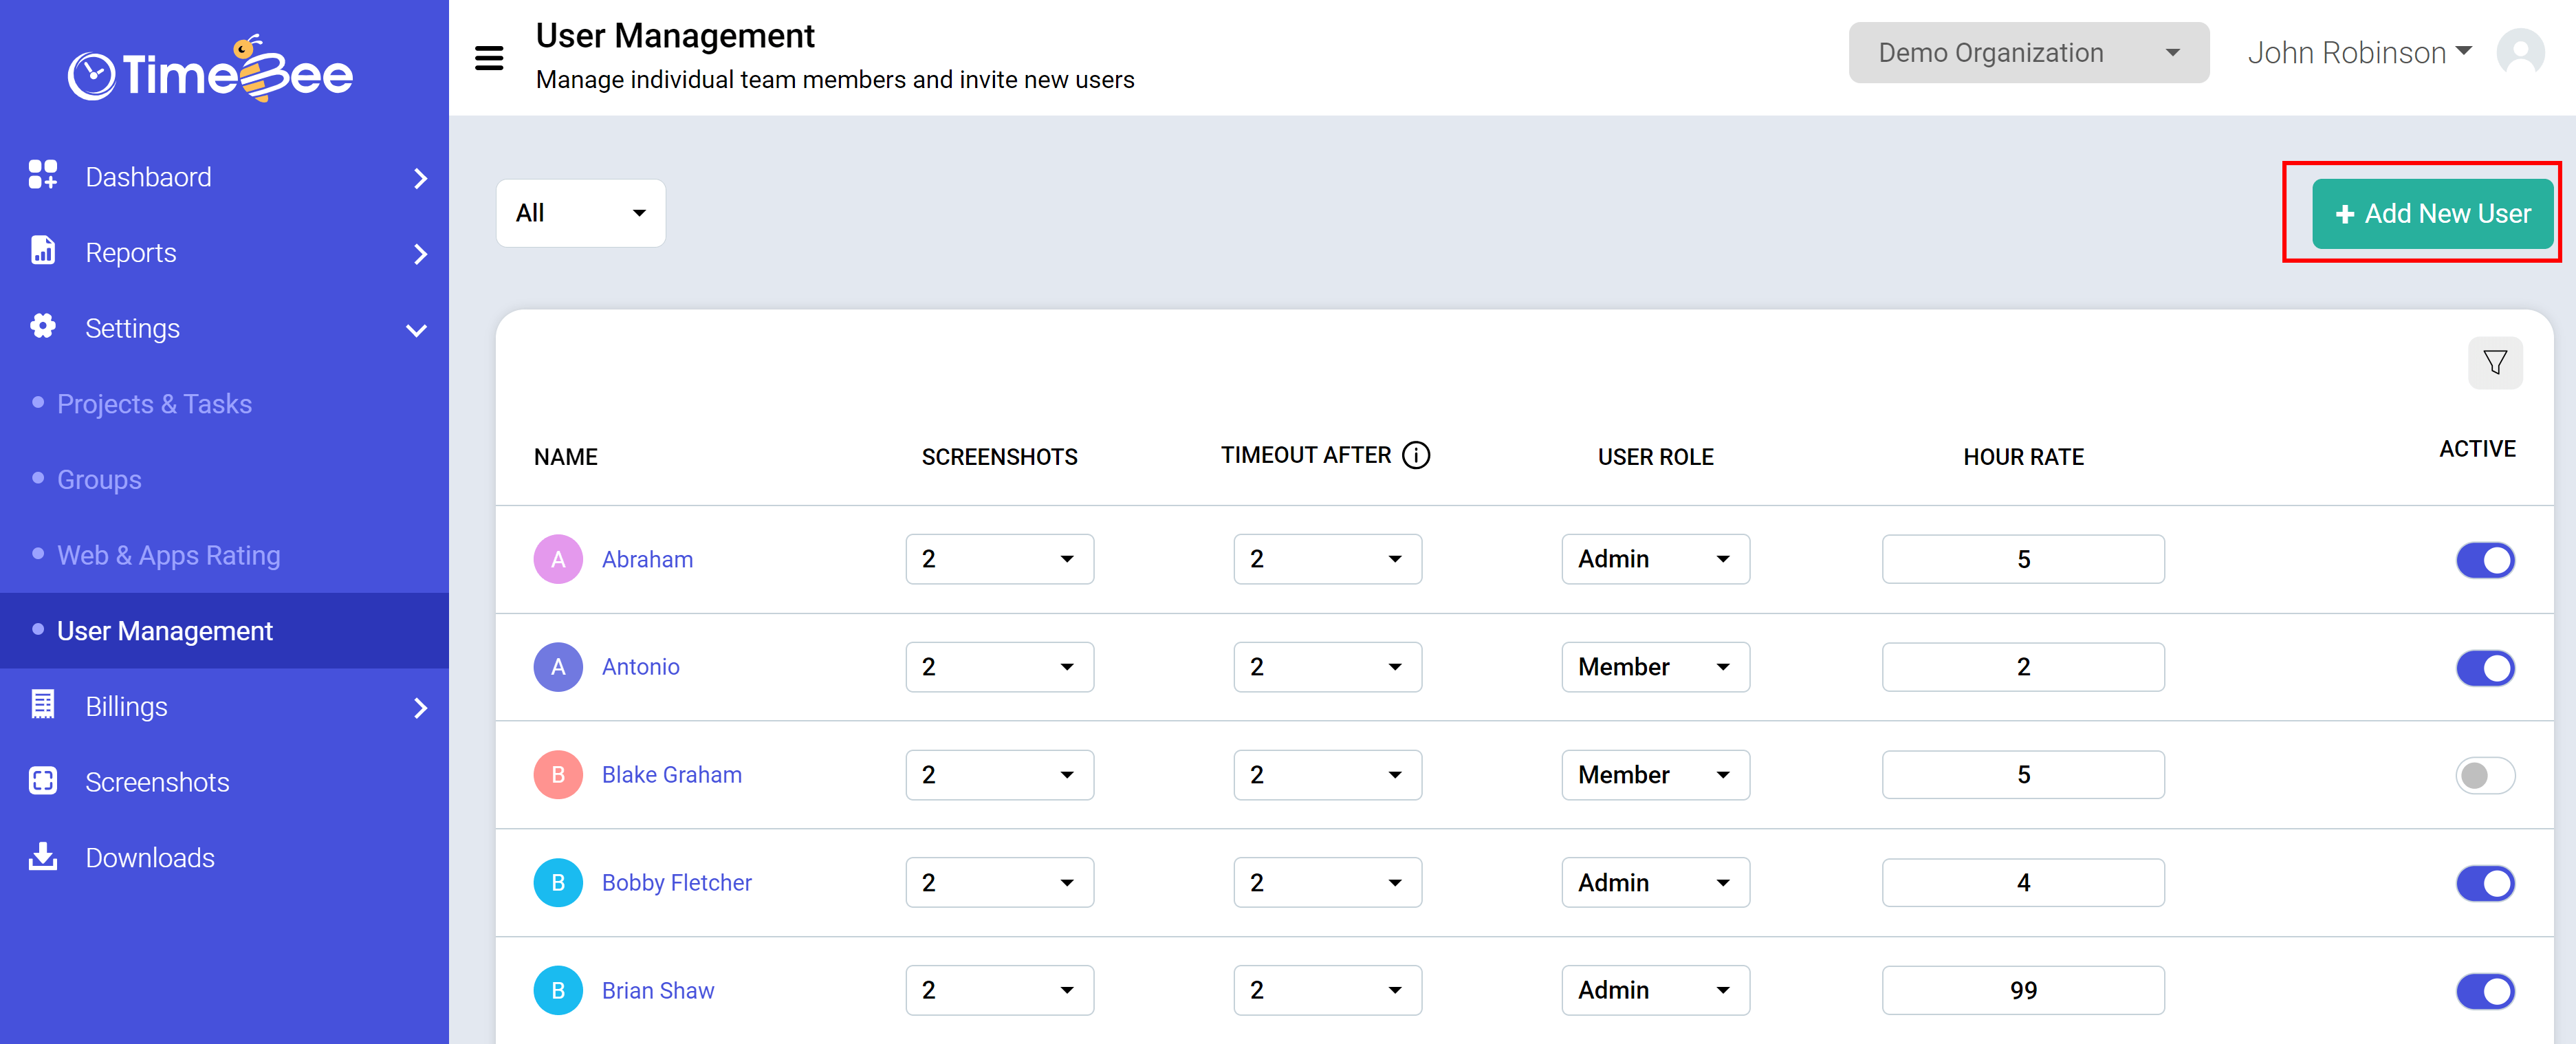
To add a new user, click on the “Add User” button on the top right corner of the “User Management” page.
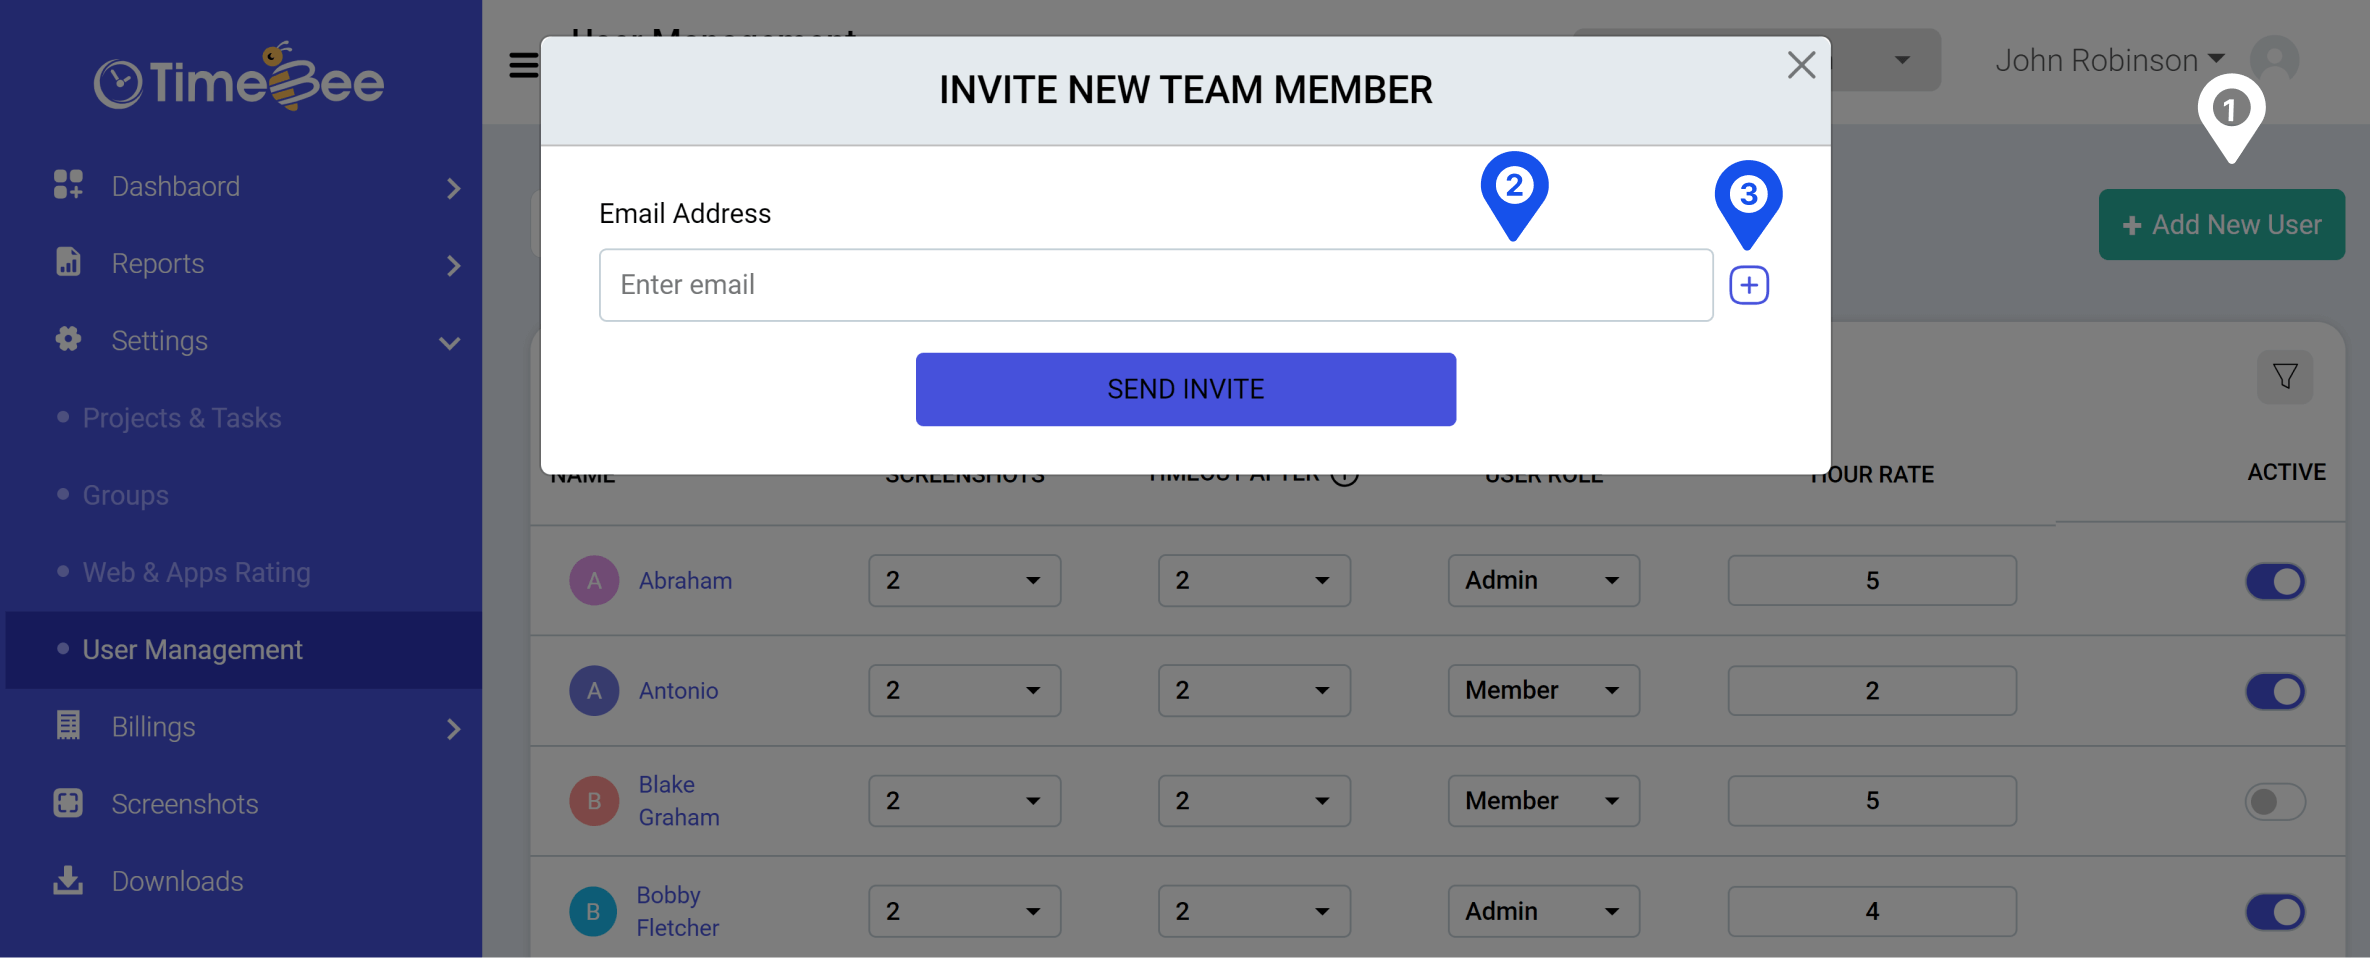
When the new window opens, enter the email of the member you want to add or invite. Add multiple members by clicking on the “+” sign.
When the team member clicks on the confirmation button after receiving the email invite, they will be automatically added to your organization and will be visible in the user directory.
You can customize tracking settings for each user under “User Management”. You can edit the following.
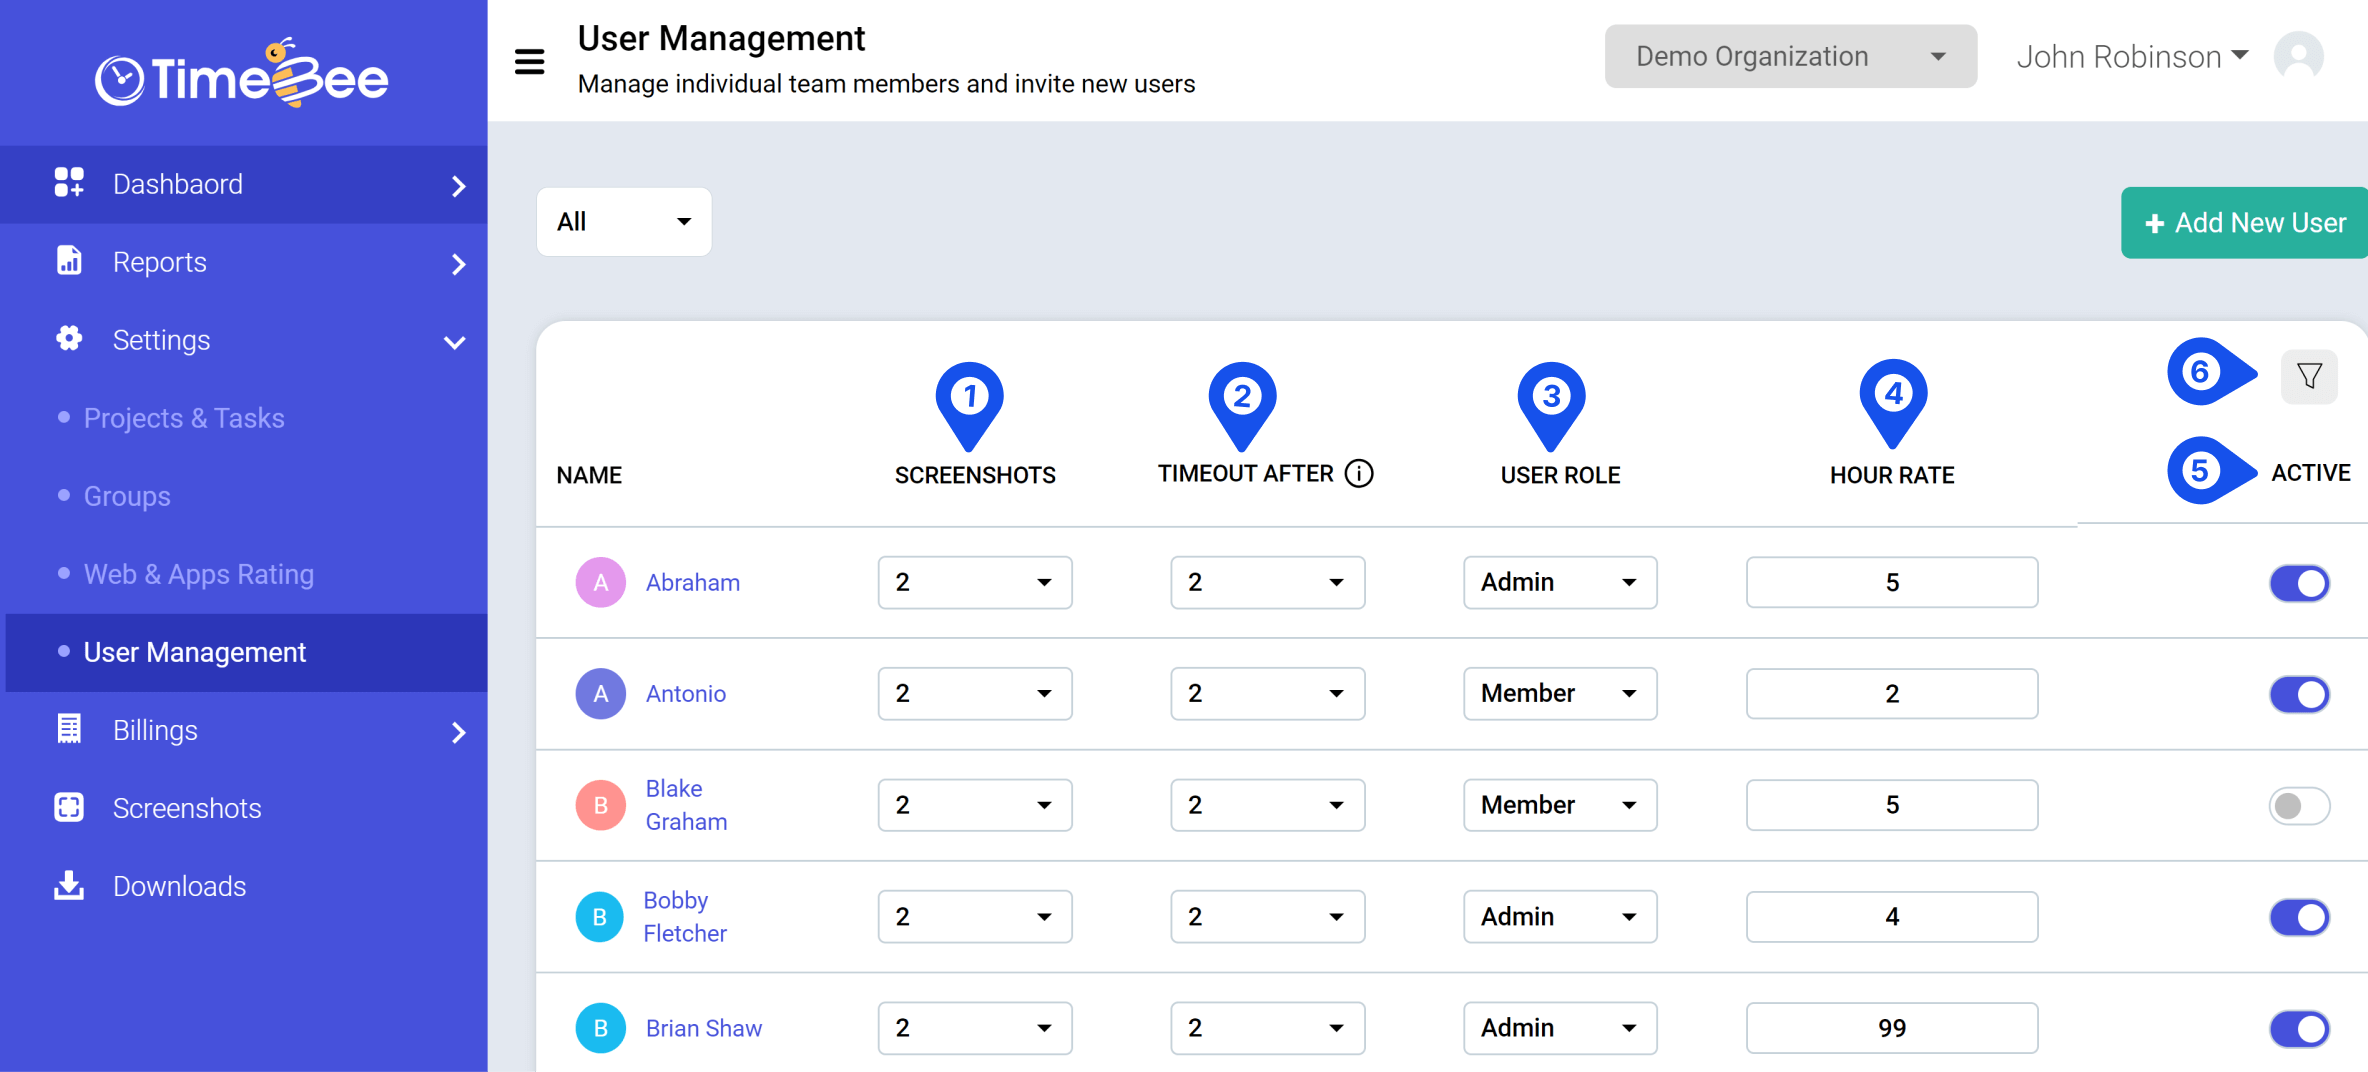
You can also hide or display the presets by clicking on the filter icon on the top right (refer to #6 on the screenshot)
To manage presets specifically for Admins or Members, use the filter at the top length corner.

Note: User Management is limited to individual user settings. For bulk settings related to screenshots and timeouts, you need to use "Organization Profile".
Only the owner or the admins can access and customize "User Managment" in TimeBee.
Try it free for 14 days and see how it can be your savior!
