The TimeBee's screenshot feature is designed to periodically capture images of the user's computer screen when the timer is active for an employee. This feature serves as a visual record of your employee’s activities, providing insights into how they carried out tasks and progressed throughout the work day.
Moreover, it lets you view single-user, multiple-user, and group screenshots. You can filter them by date, making analysis and reporting easier.
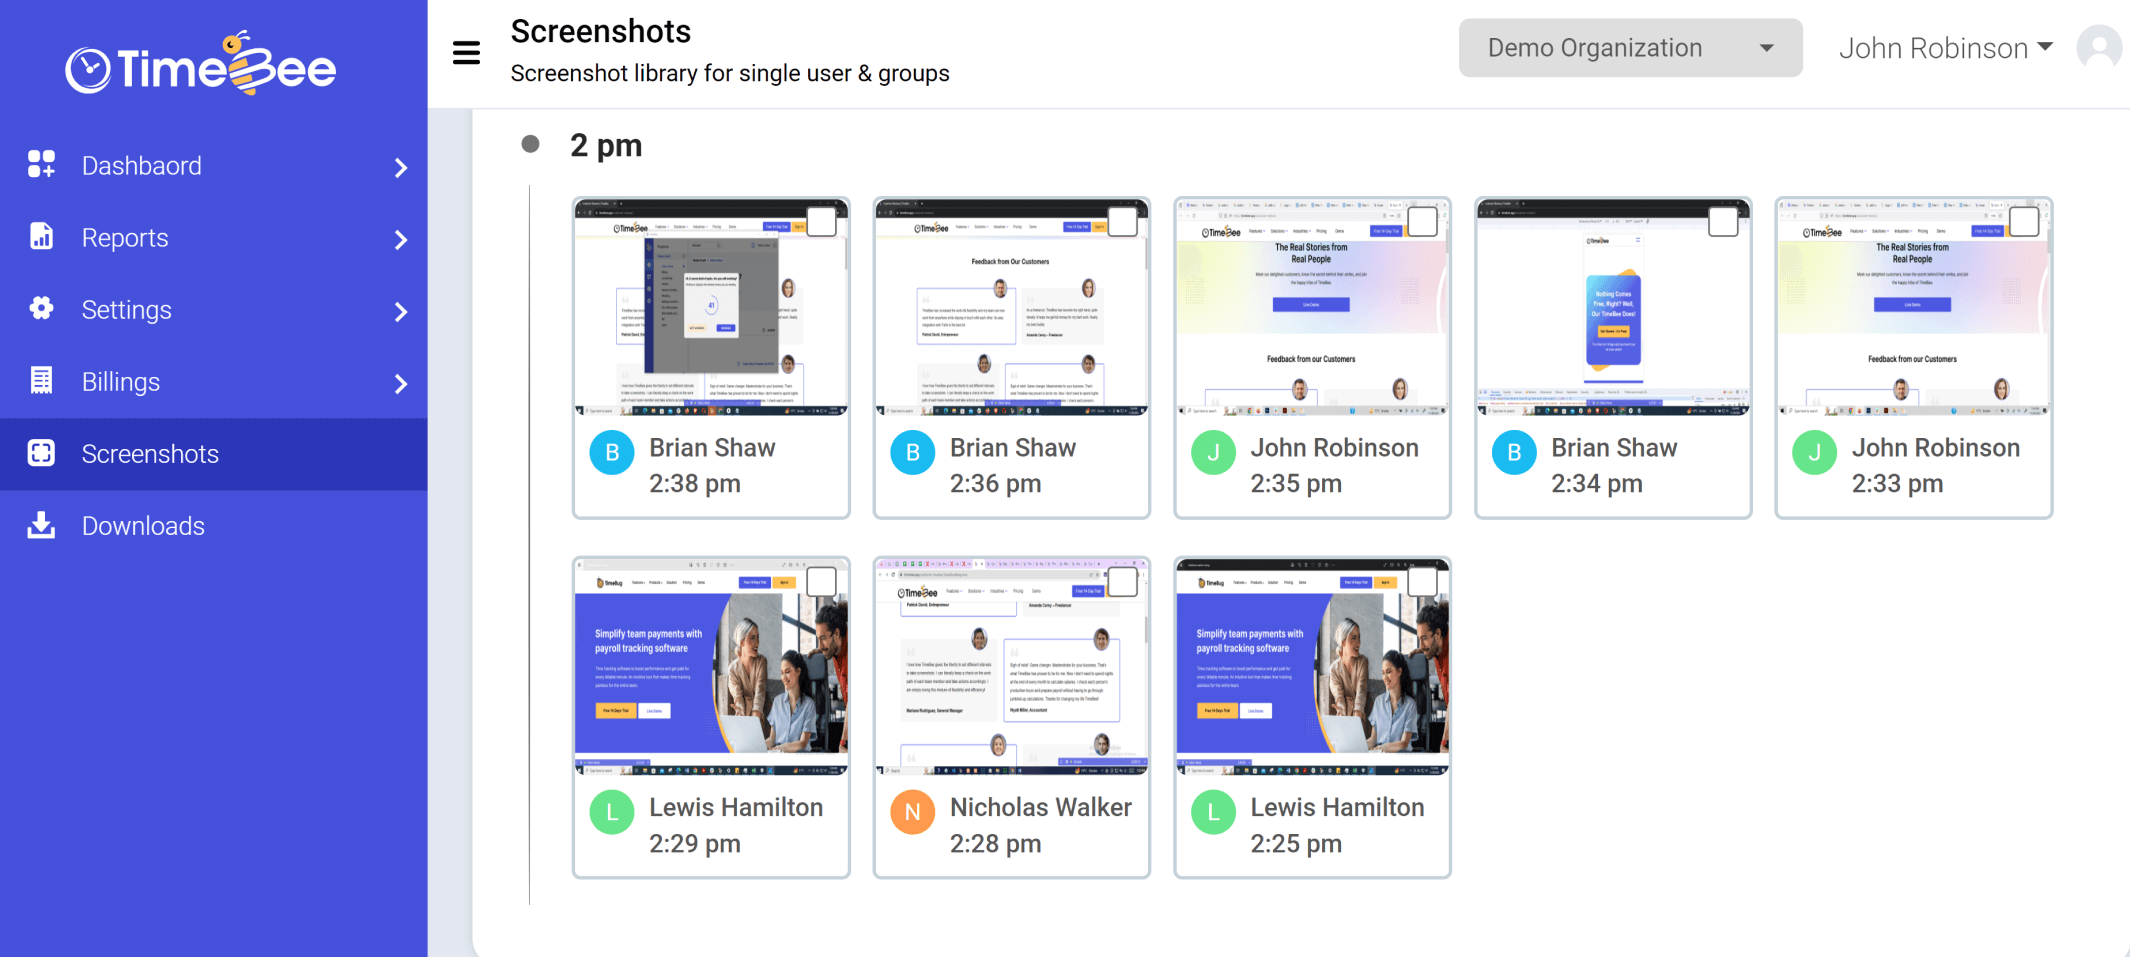
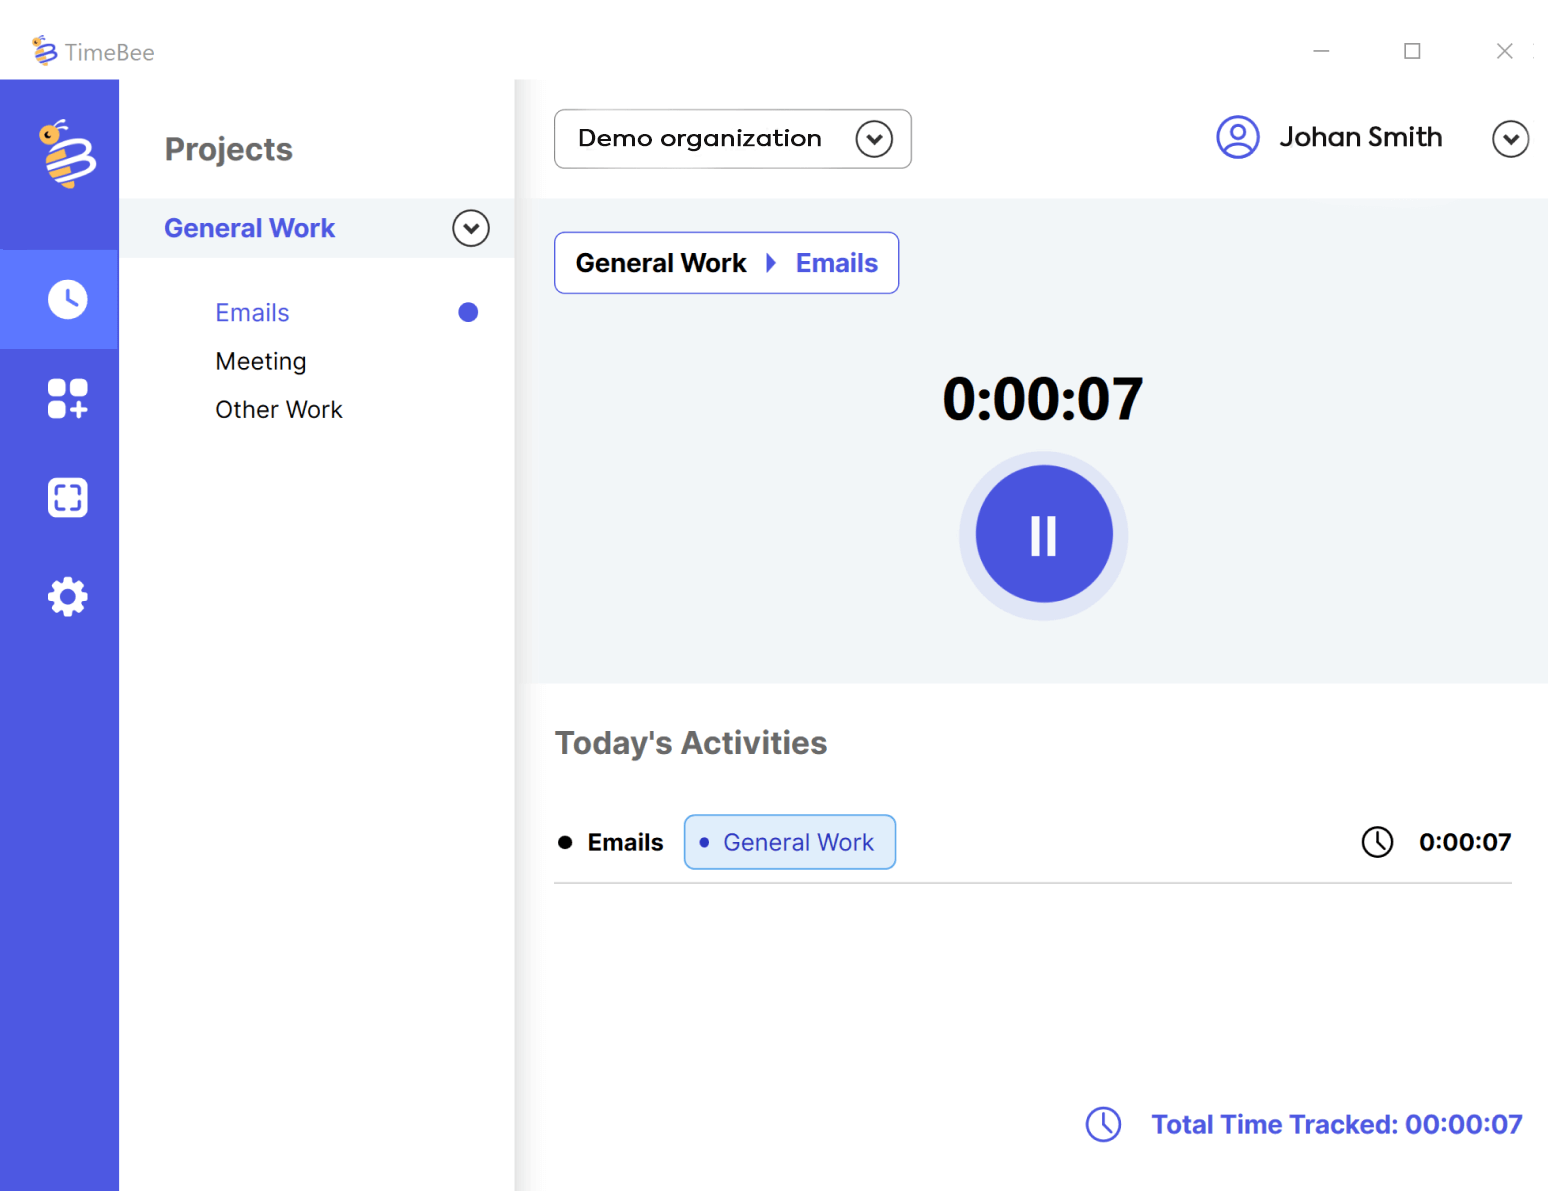
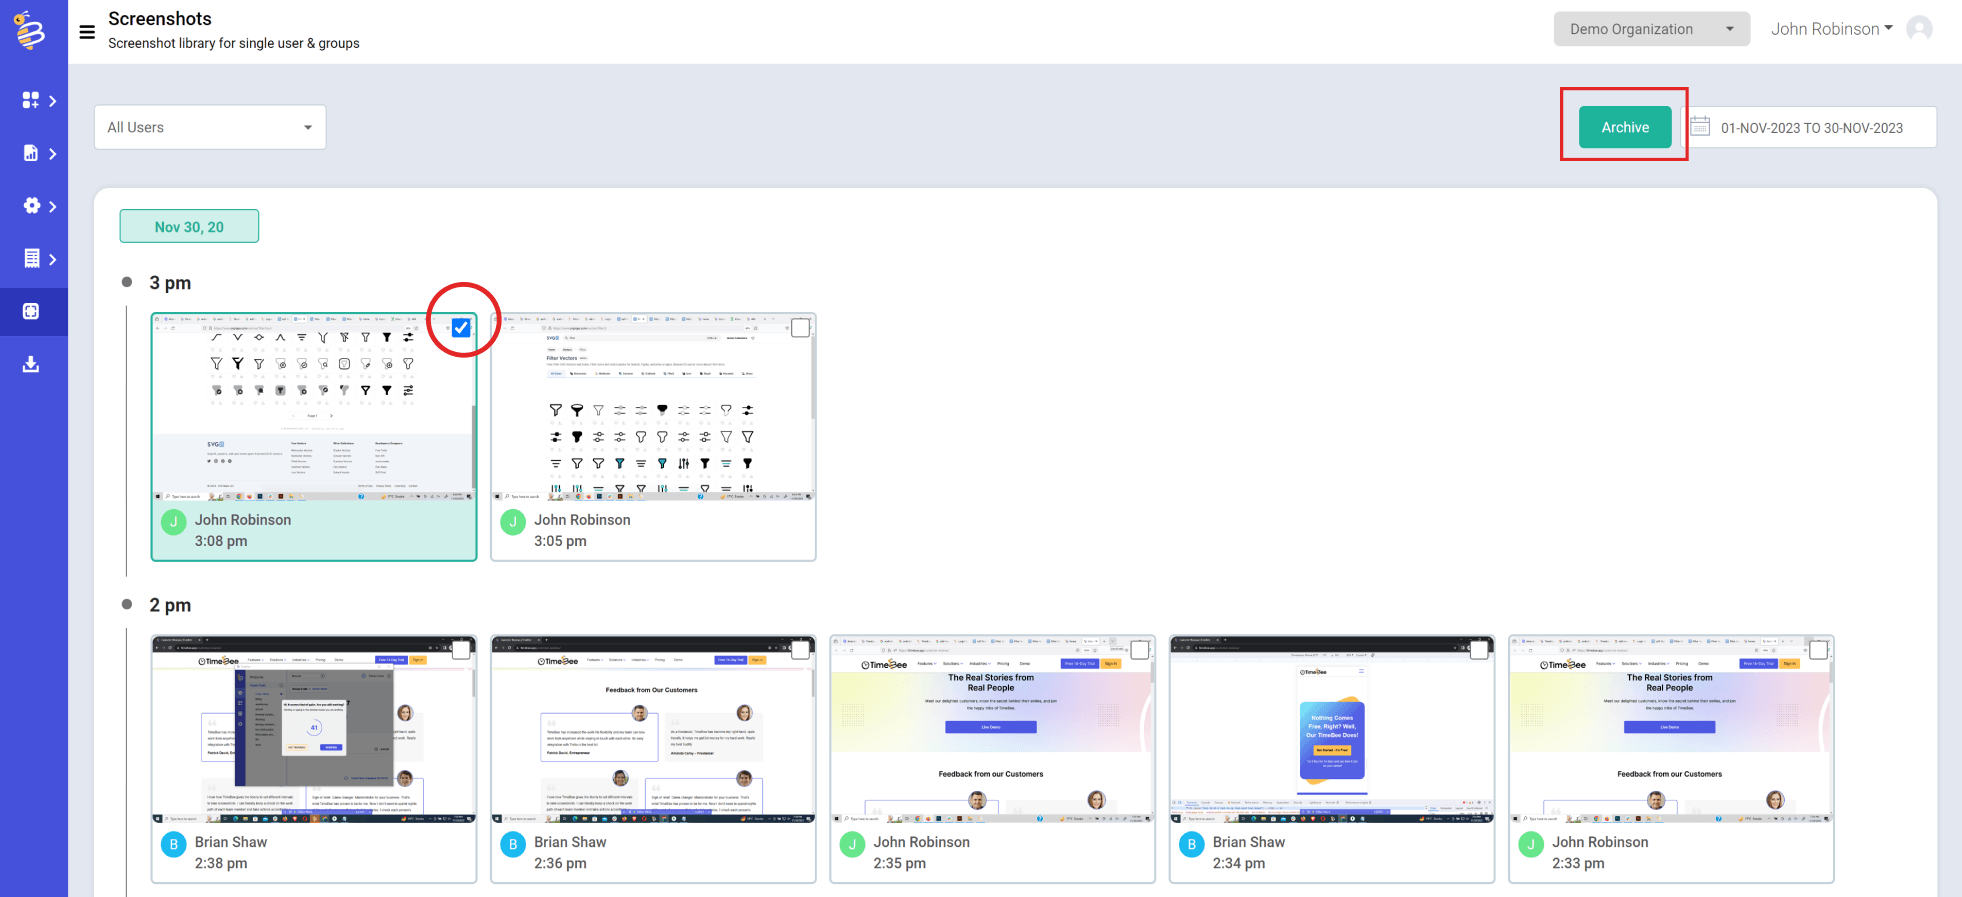
The 'Screenshots' page is accessible through the dashboard sidebar and the desktop app, enabling you to review screenshots of members who have activated this feature.
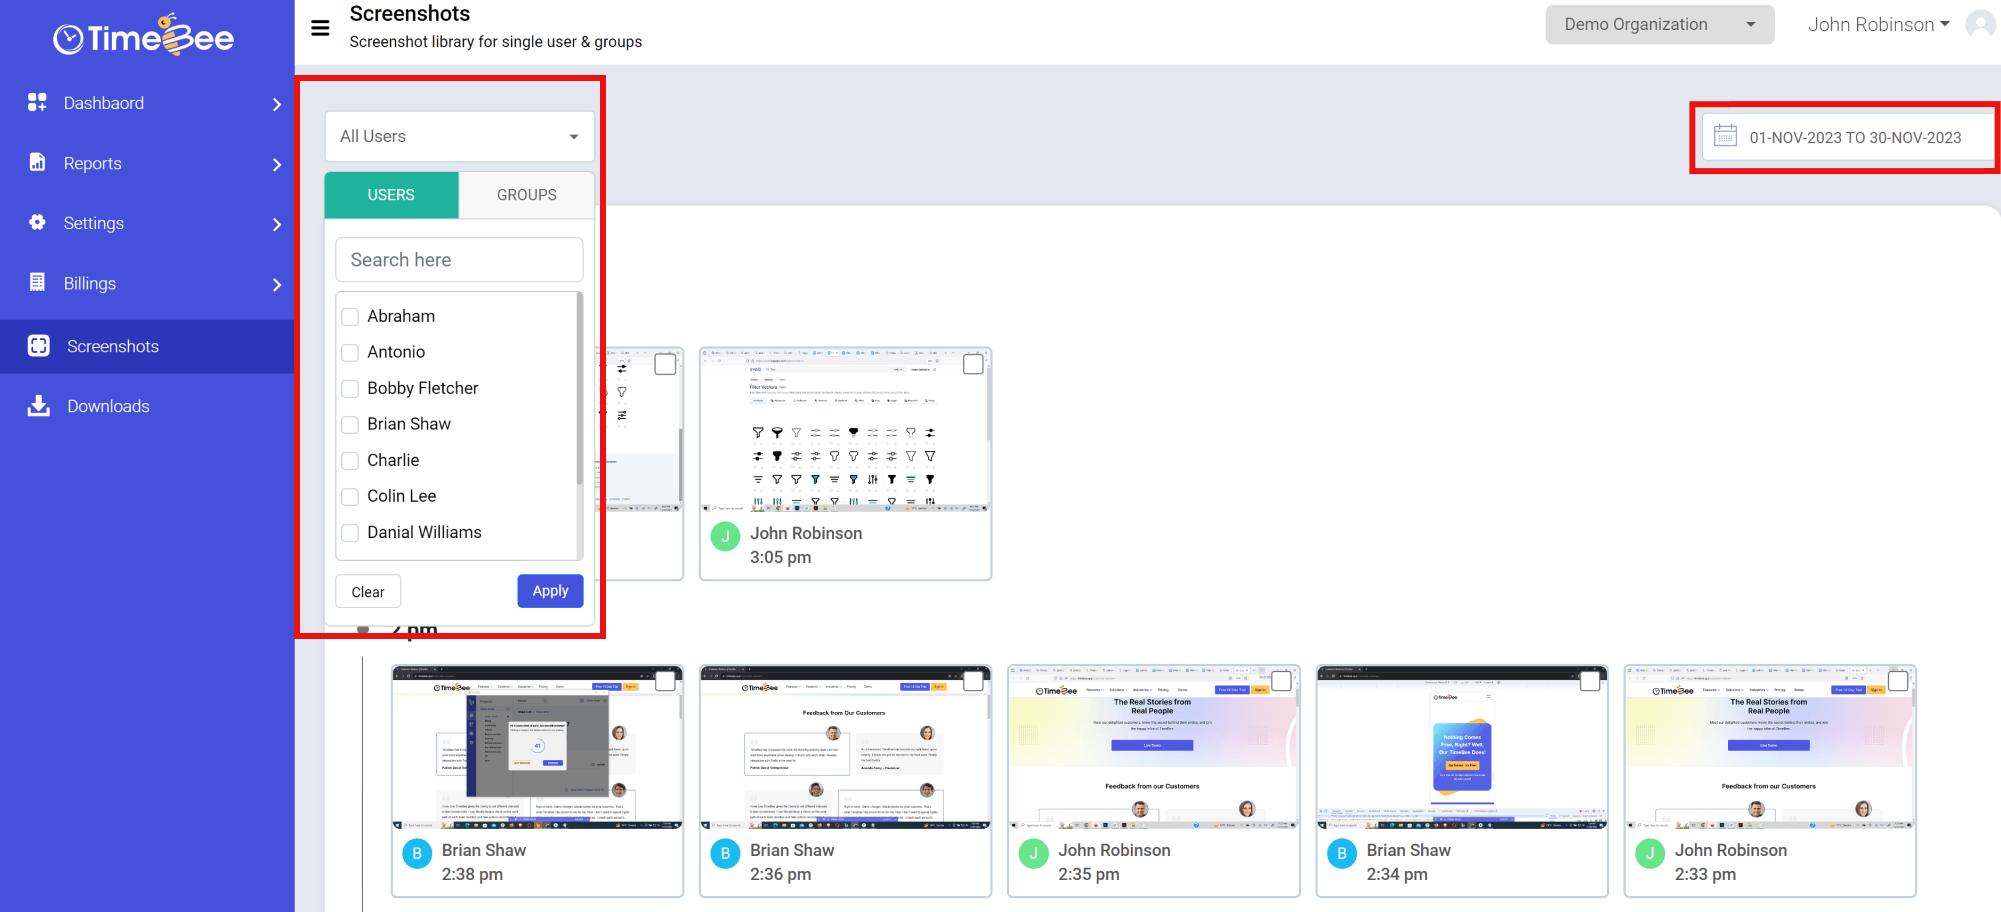
You can view screenshots for a single user, multiple users, or groups. Use the date filter to view screenshots sorted for a specific time frame.
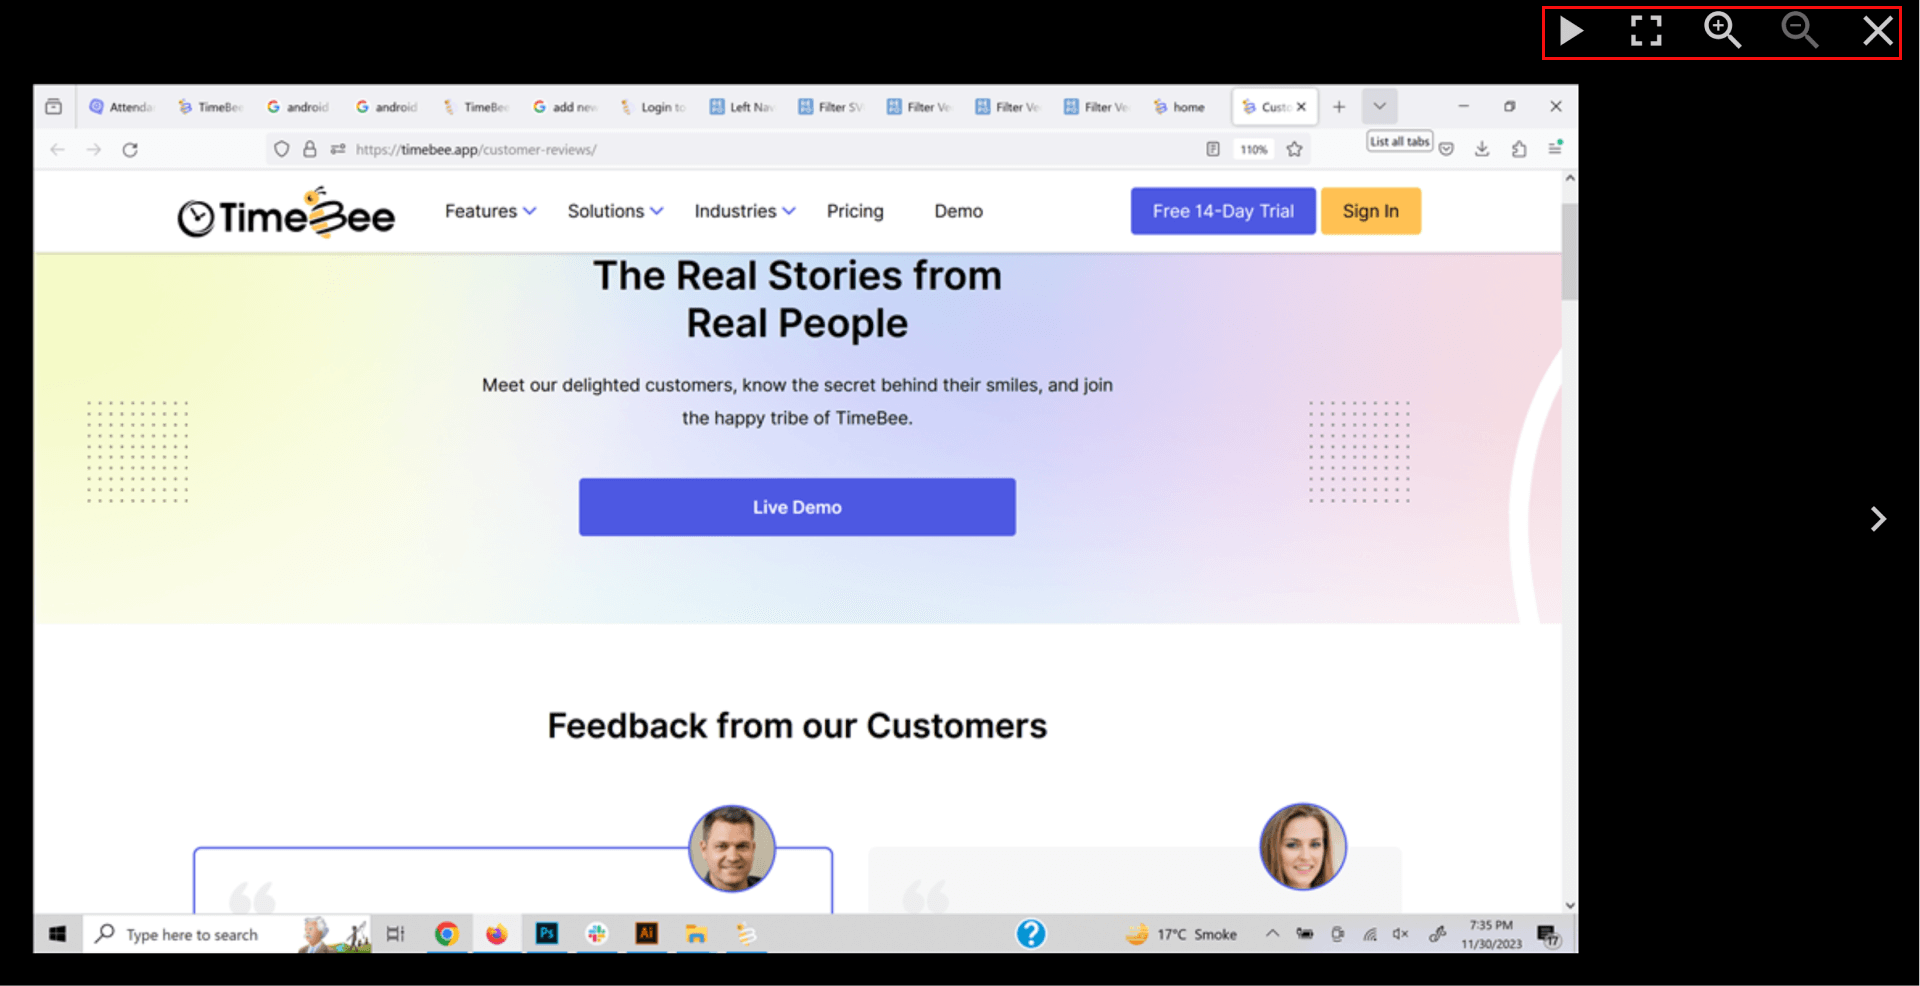
Select any thumbnail to enlarge the image which will open in a gallery. In the top right toolbar, you can:
To archive a screenshot or multiple screenshots, click on the white box and select “Archive.”
There are two ways to configure screenshots.
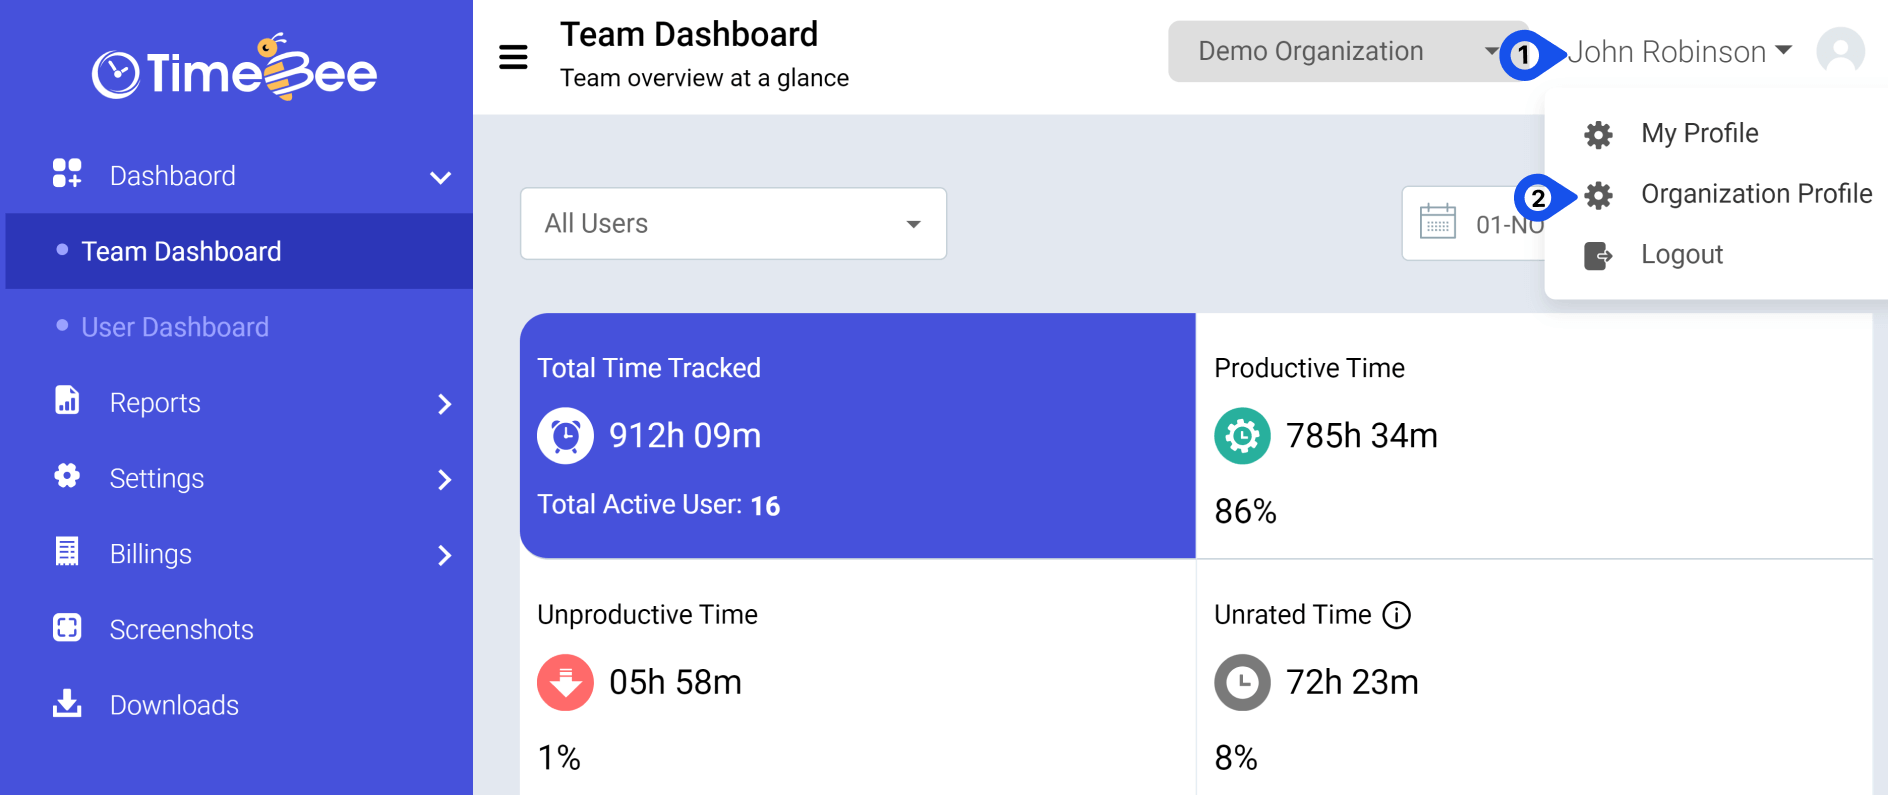
You can enable Screenshots for the entire organization from “Organization Profile."
Click on your name on the menu bar and select “Organization Profile” from the drop-down menu.
A new window will appear. Find "Screenshots" and choose your preferred interval from the available options in the drop-down menu.
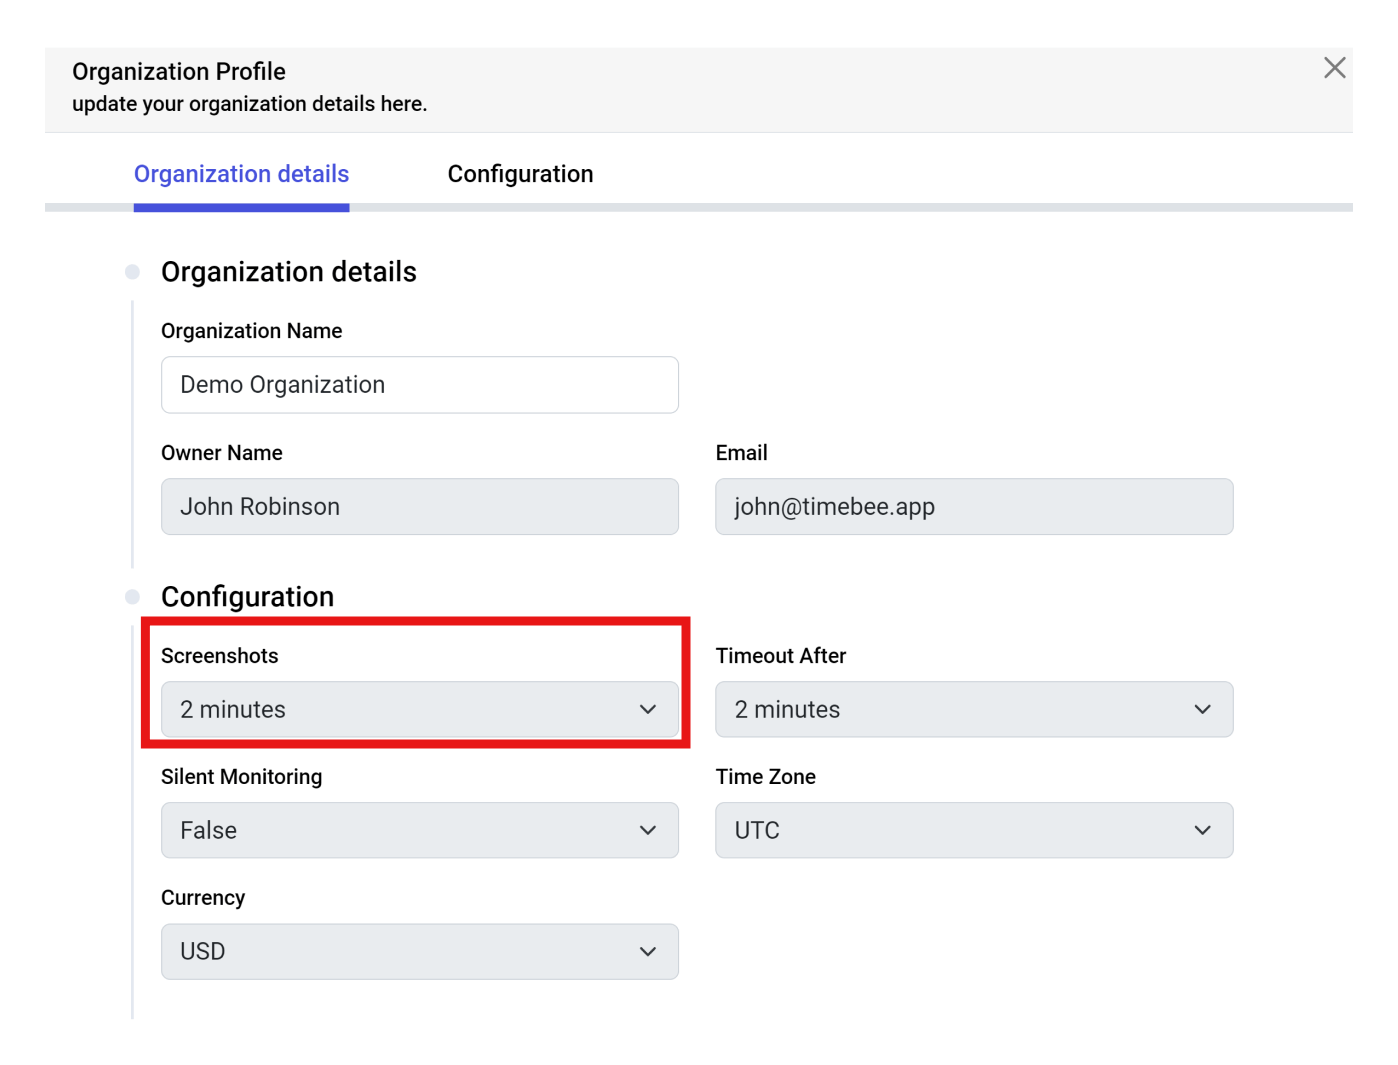
Note: When you set intervals through “Organization Profile”, they will be applied to all members except those who have already configured customized settings.
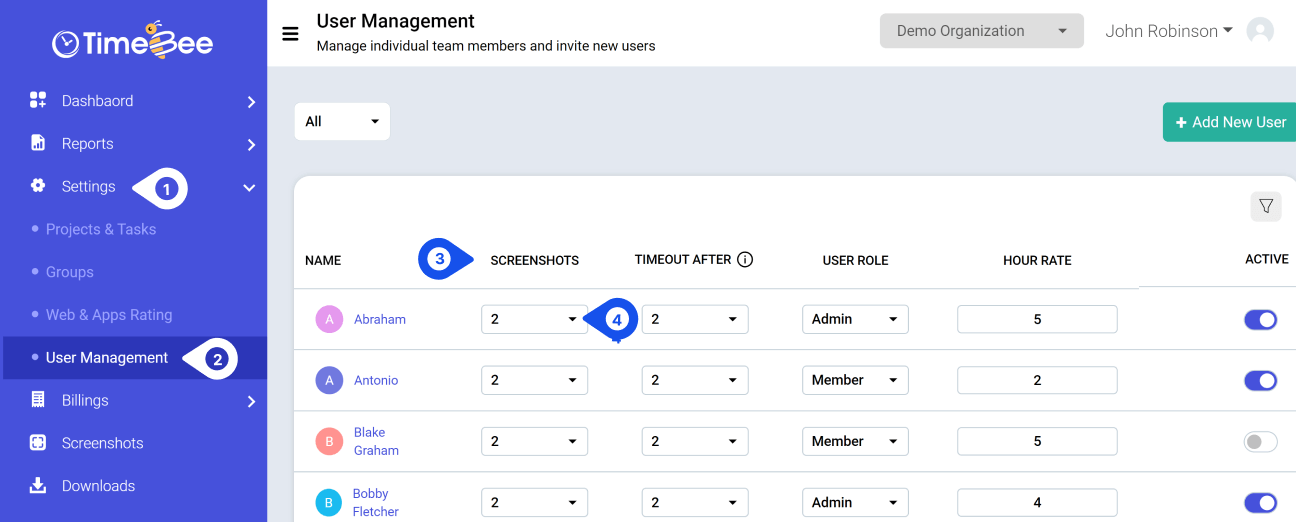
To set screenshot intervals for a single user, go to “Settings” and then click on “User Management”. Find “Screenshots” here and choose the interval for any user.
Only the owner or an admin can set screenshot intervals and view screenshots of all the users. Members can only access their own screenshots through either the desktop app or the web-based dashboard.
Try it free for 14 days and see how it can be your savior!
