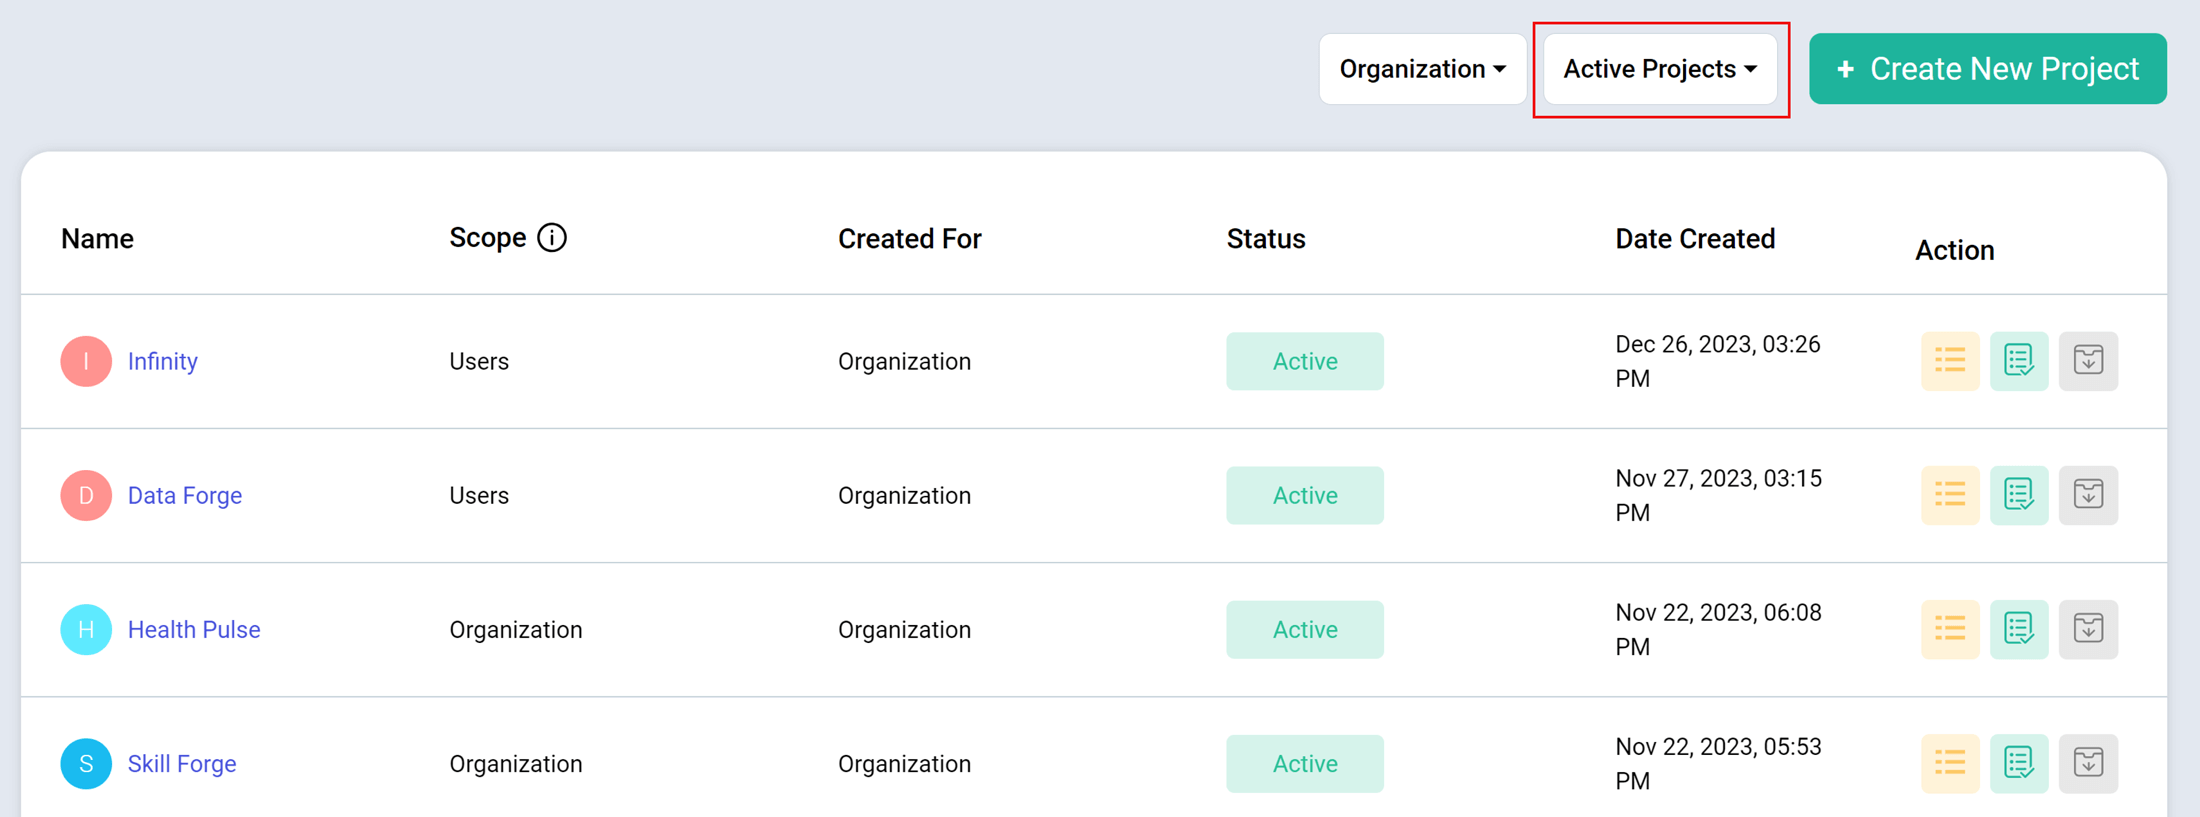
The Projects and Tasks feature in TimeBee tracks employee progress and helps manage multiple projects simultaneously. It also allows managers to delegate specific tasks to employees.
The Projects and Tasks page includes:
a. Organization: These are organization-wide projects. Everyone in your organization can view and access these projects.
b. User: Accessible and visible to only users you select.
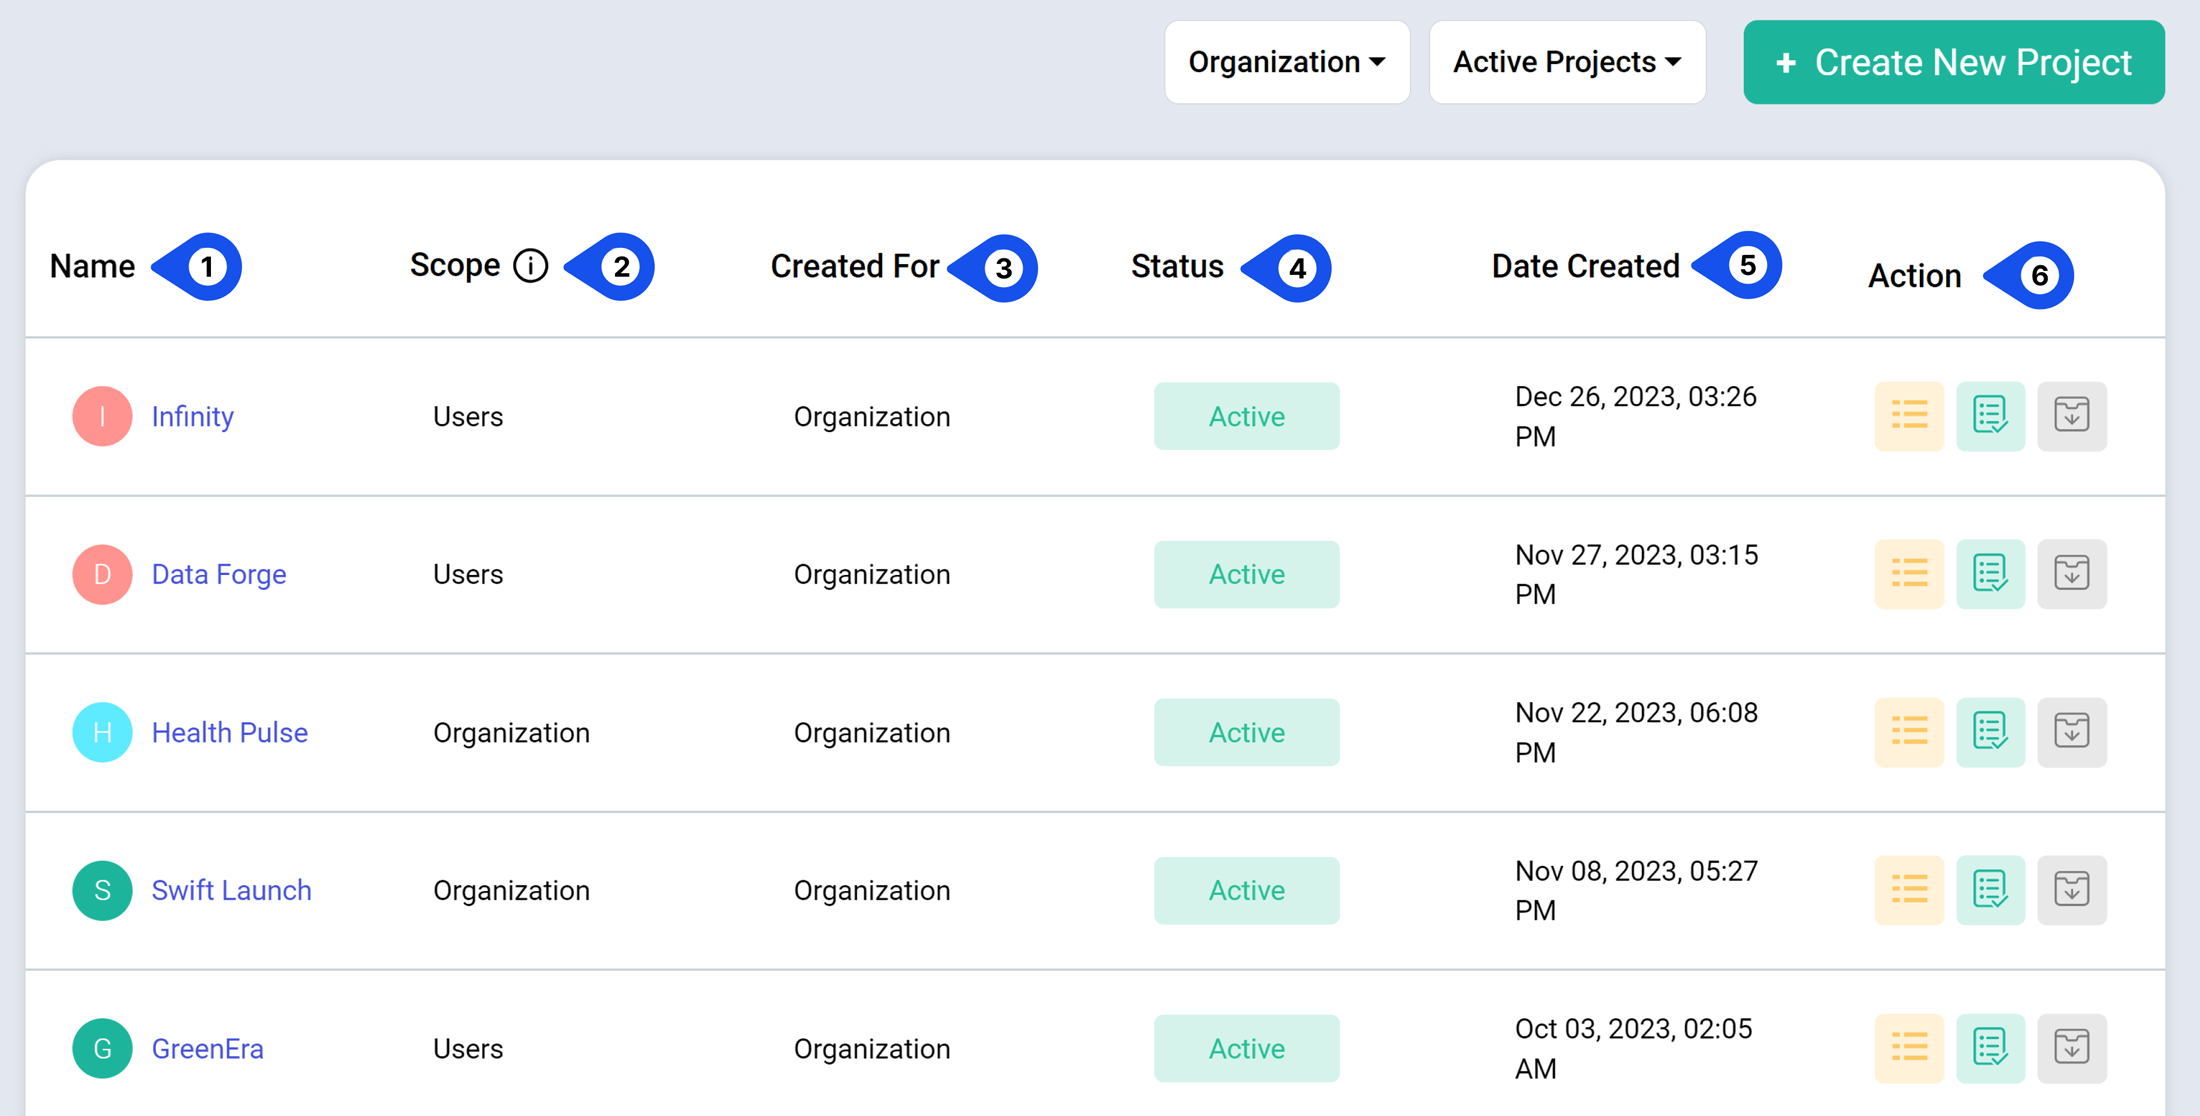
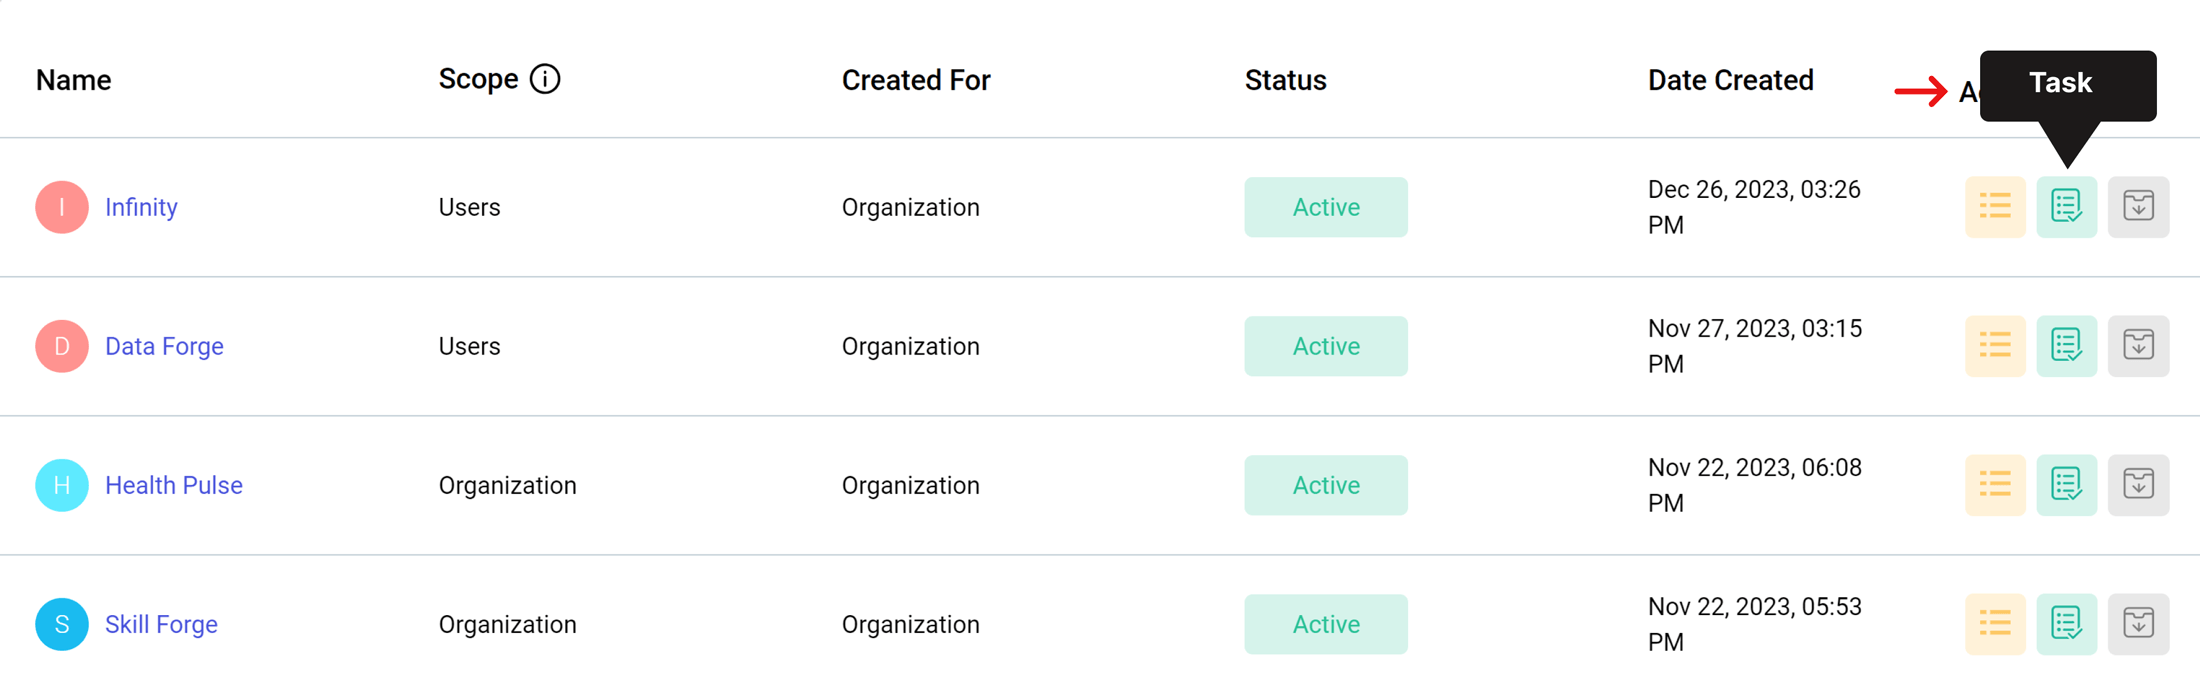
The Project and Tasks page allows users to view all the active and archived projects. The date column also shows when the project was created. The three icons on the right corner of the screen under the label ‘Actions’ represent the actions you can perform against each project.
These icons include:
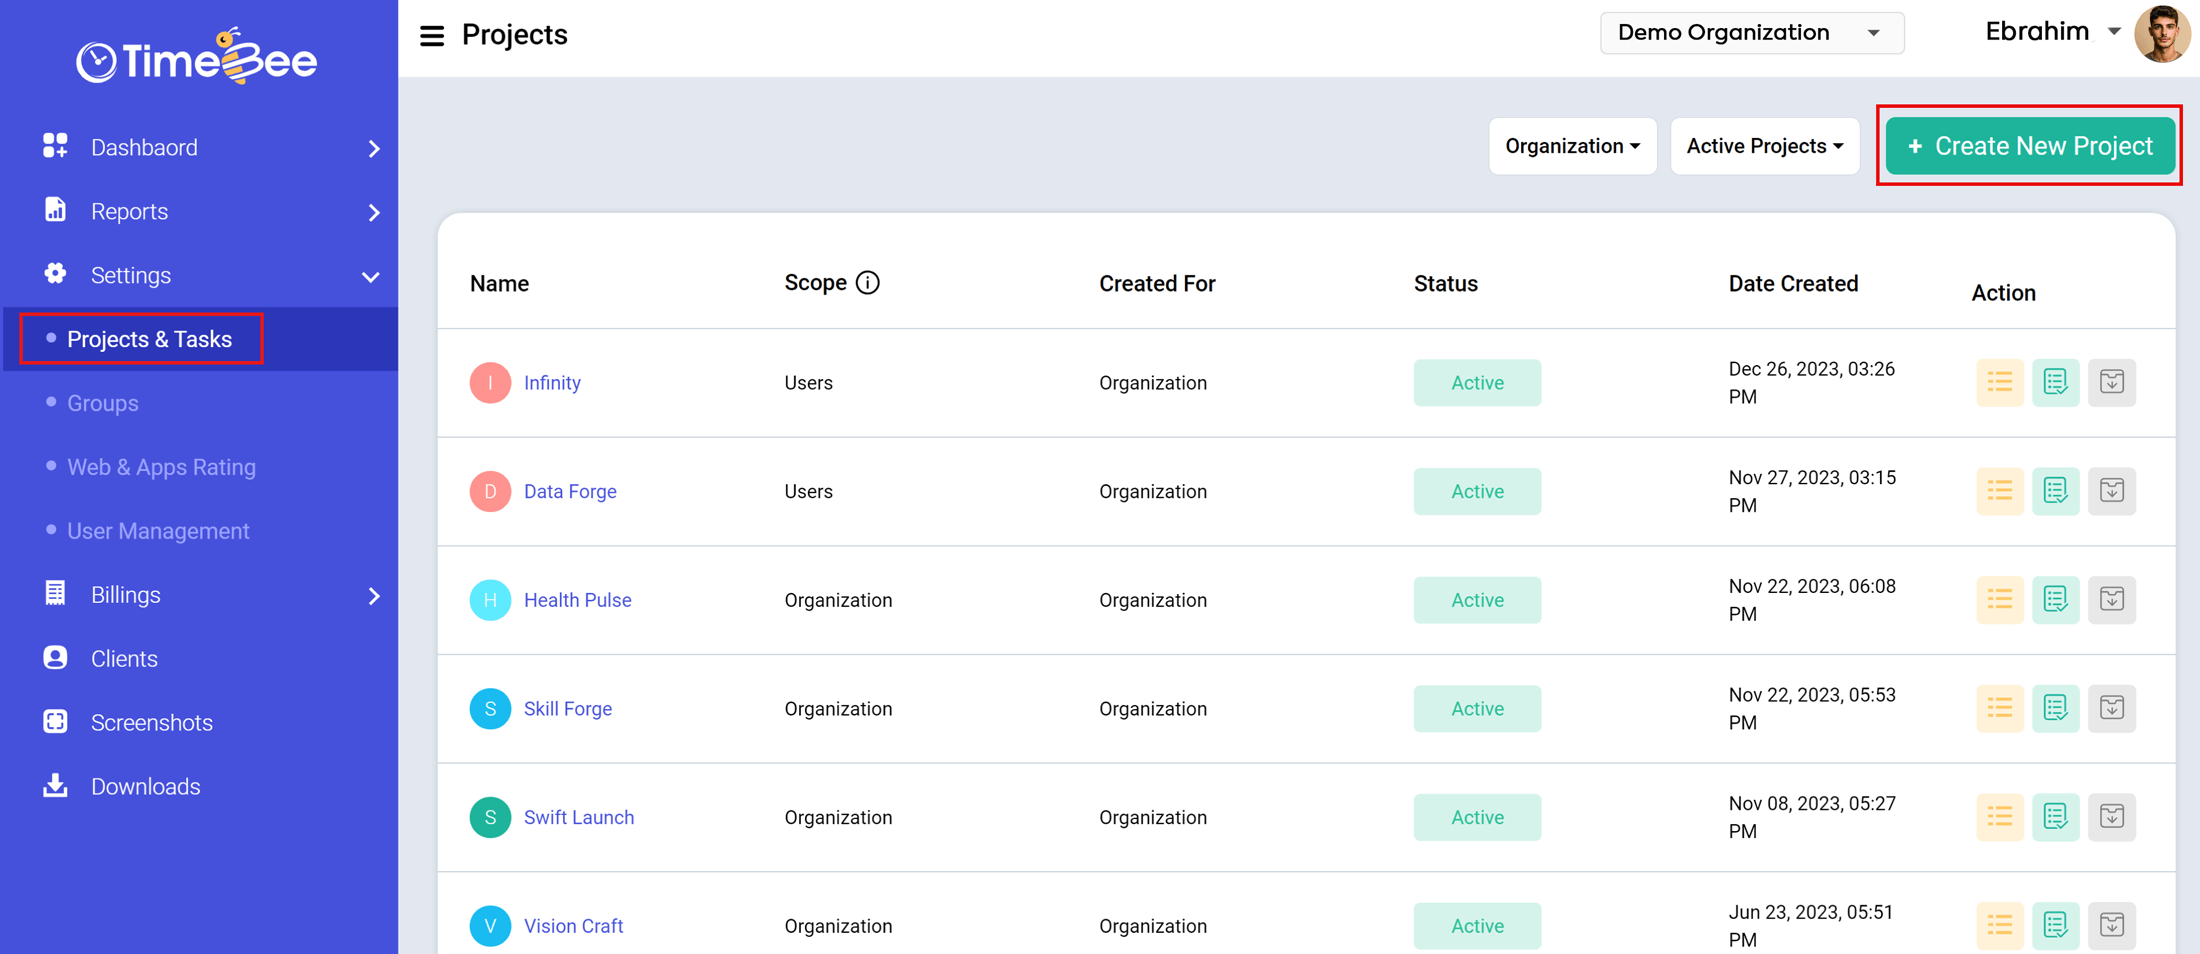
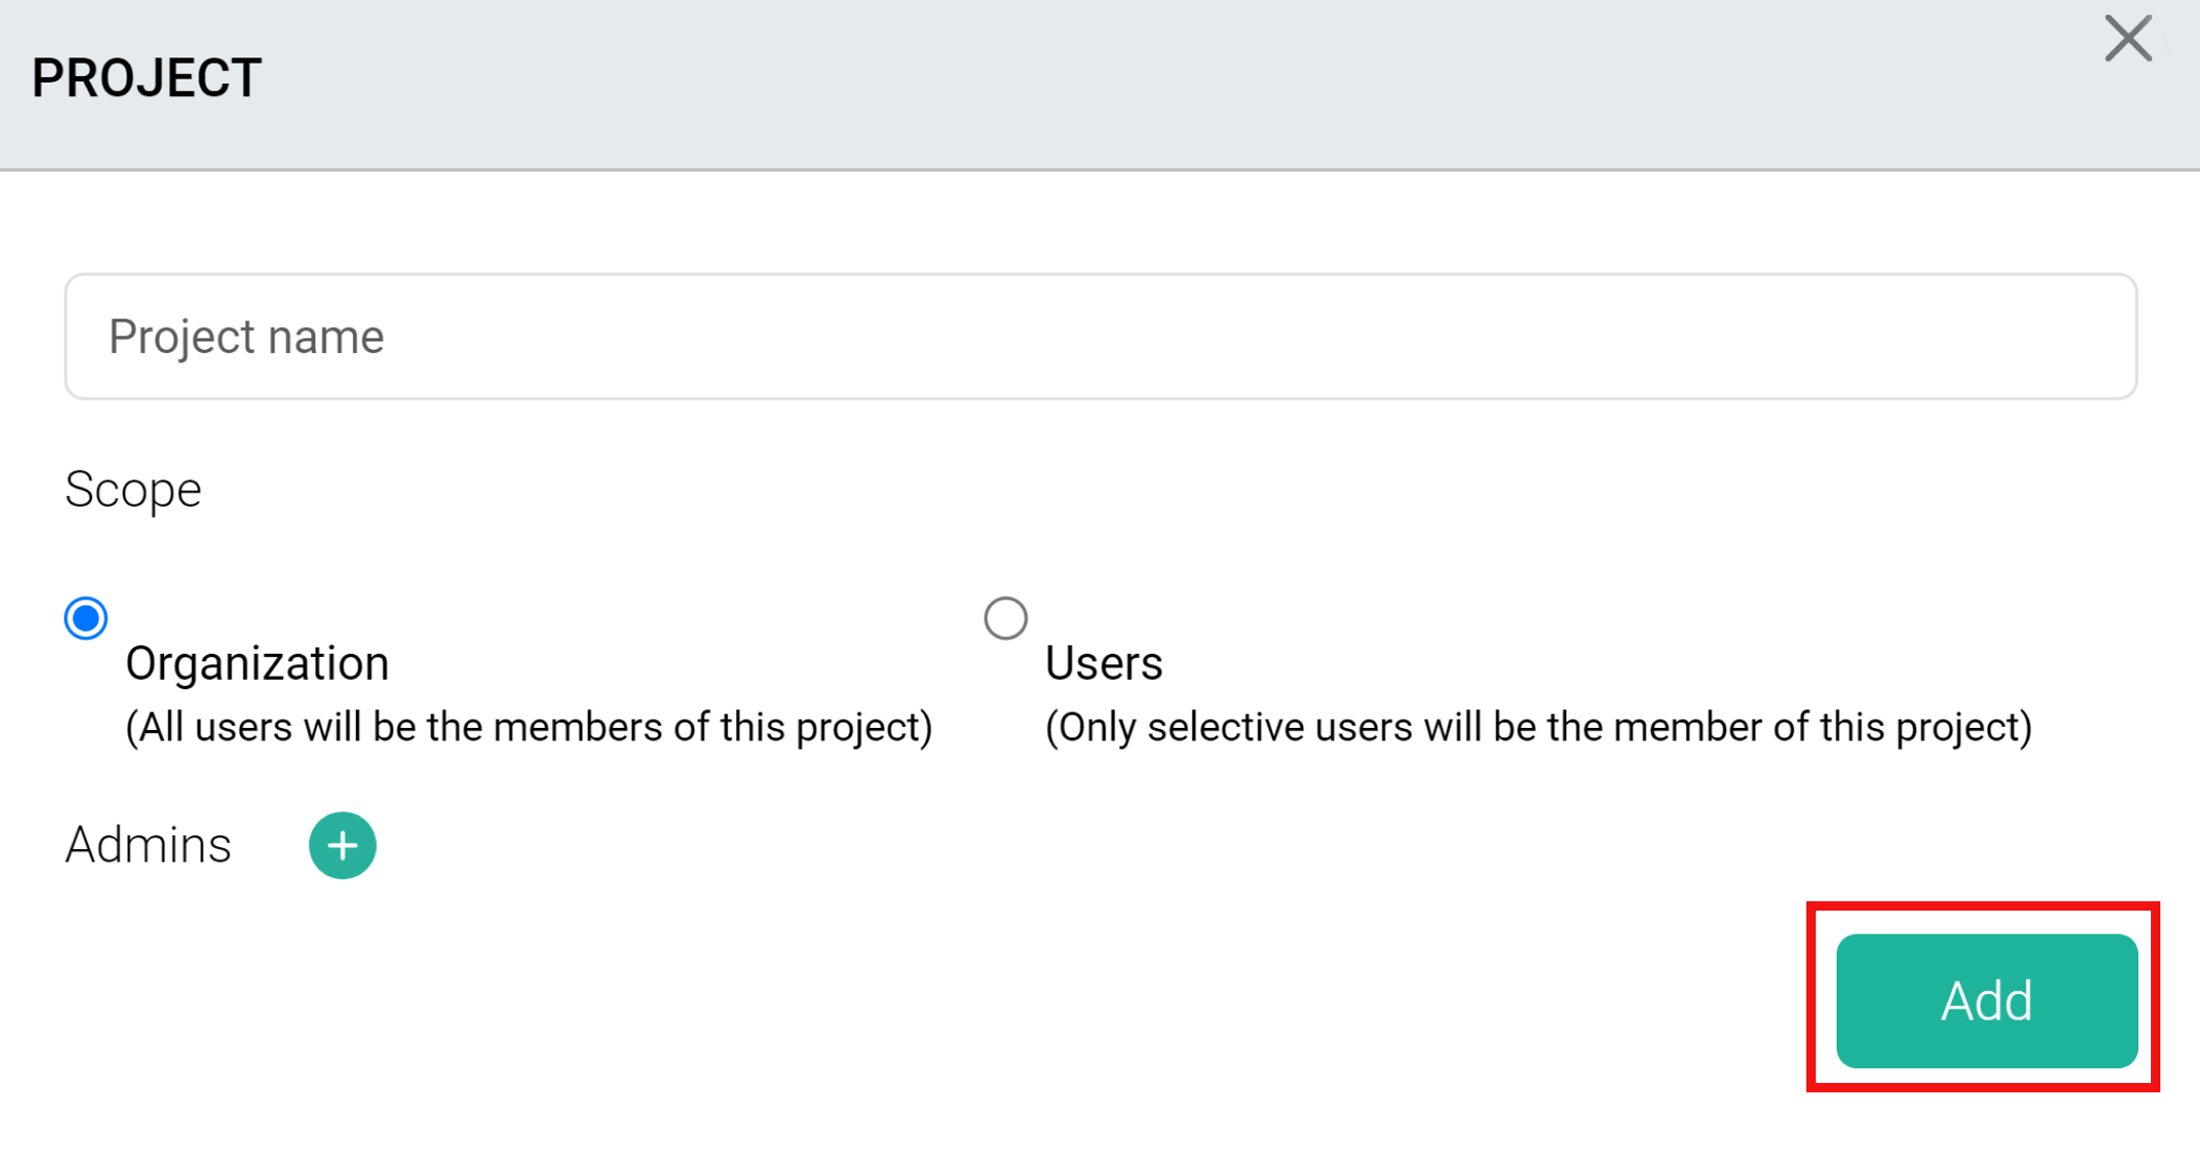
Step 1: Open the “Projects and Tasks” page and click on “Create New Project” on the top right corner.
Step 2: Next, add the name of the project.

Step 3: Choose "Organization" if the project is for the entire organization. Opt for "Users" under "Scope" and enter the names of specific users if it is intended for them.
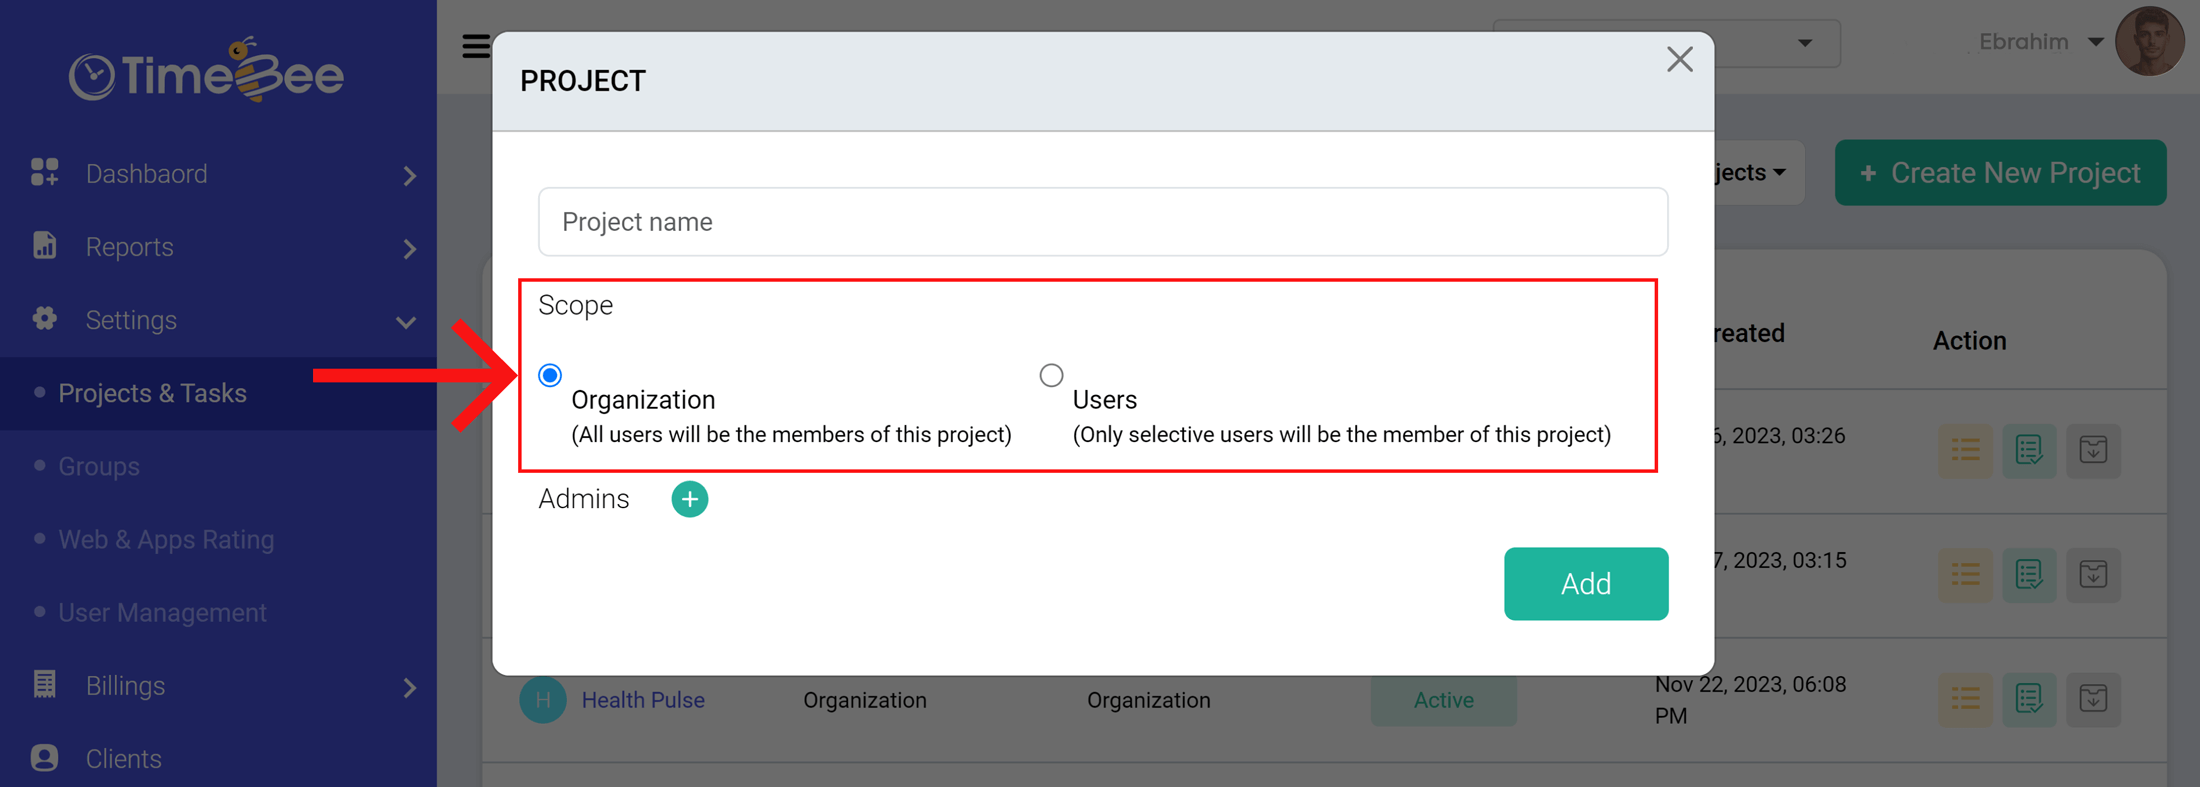
Step 4: Add the name of the Admin/Project Manager and click “Add” to save your project.
Choosing "Organization" under "Scope" will make the project visible to all organization users and appear in their desktop app. On the other hand, selecting "Users" under "Scope" will limit visibility to the specified users.
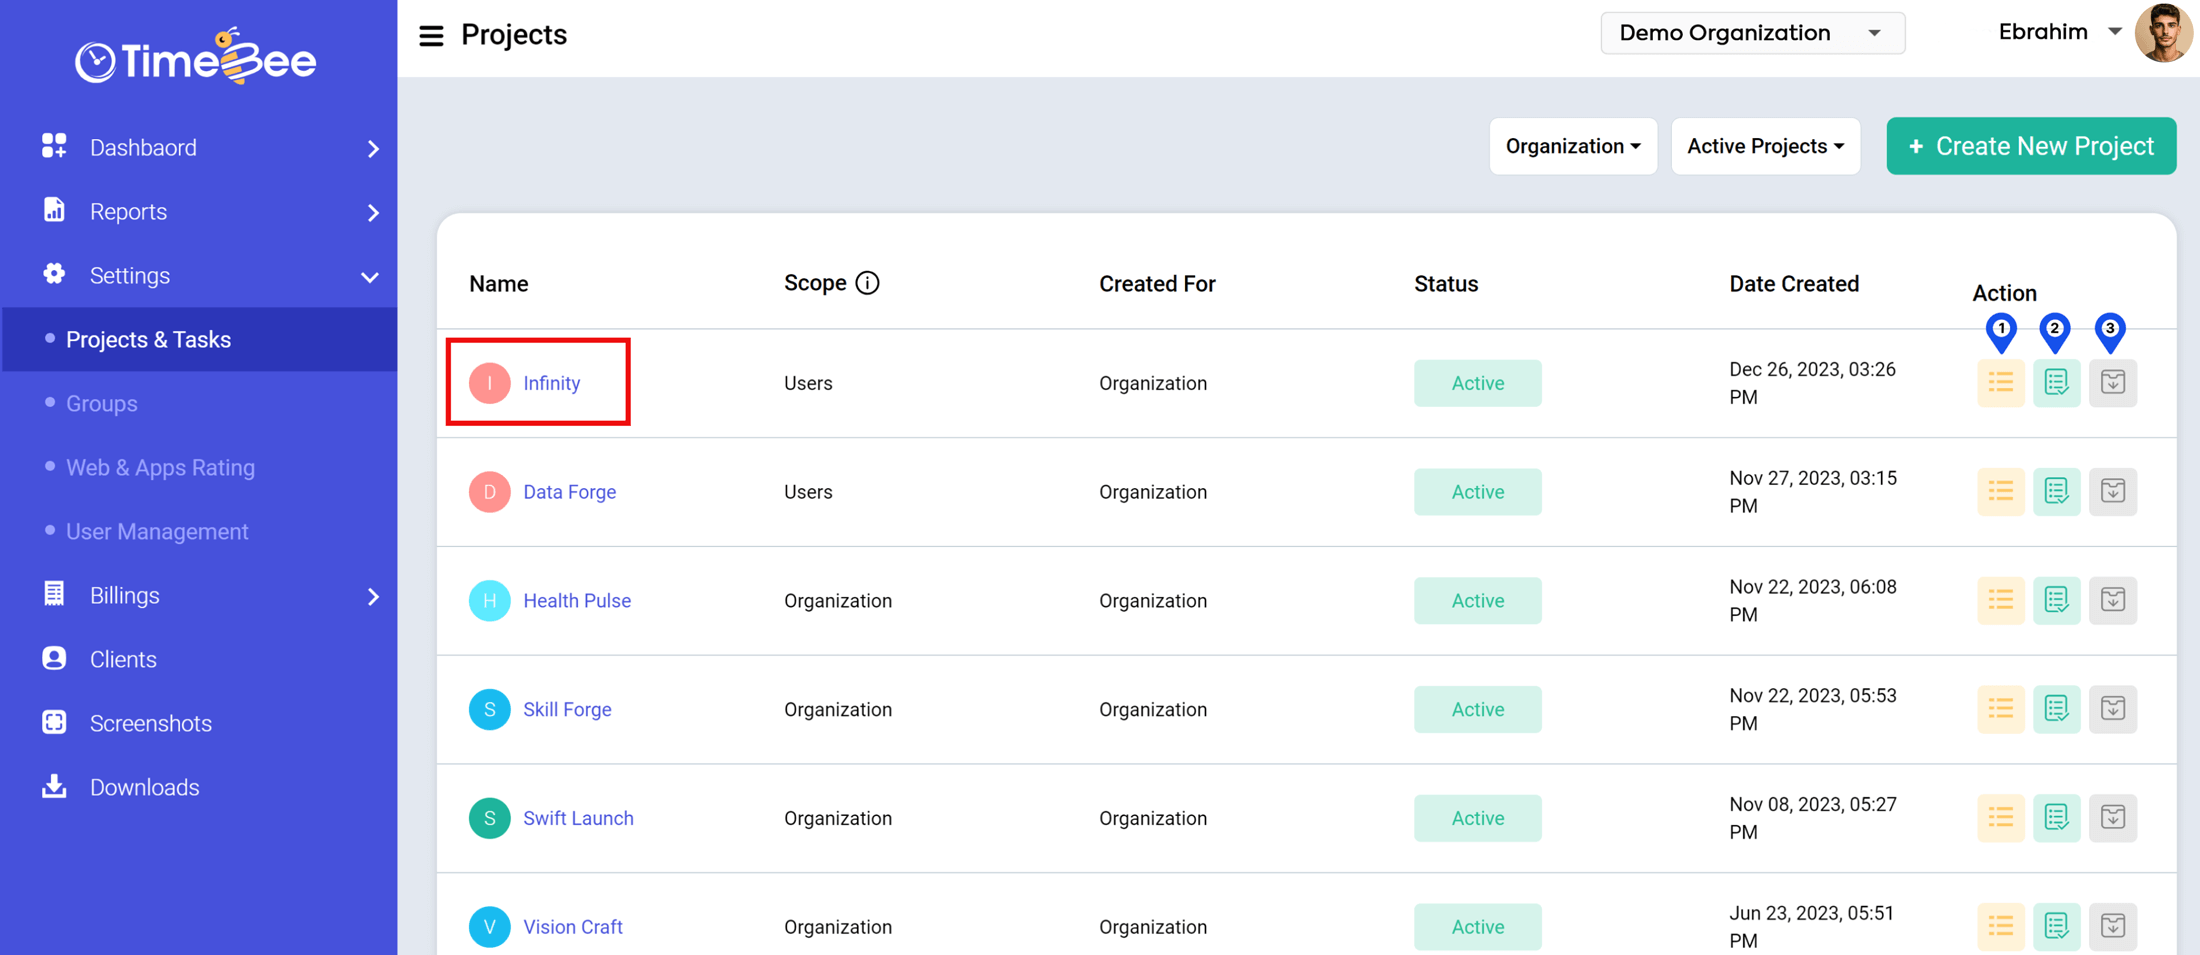
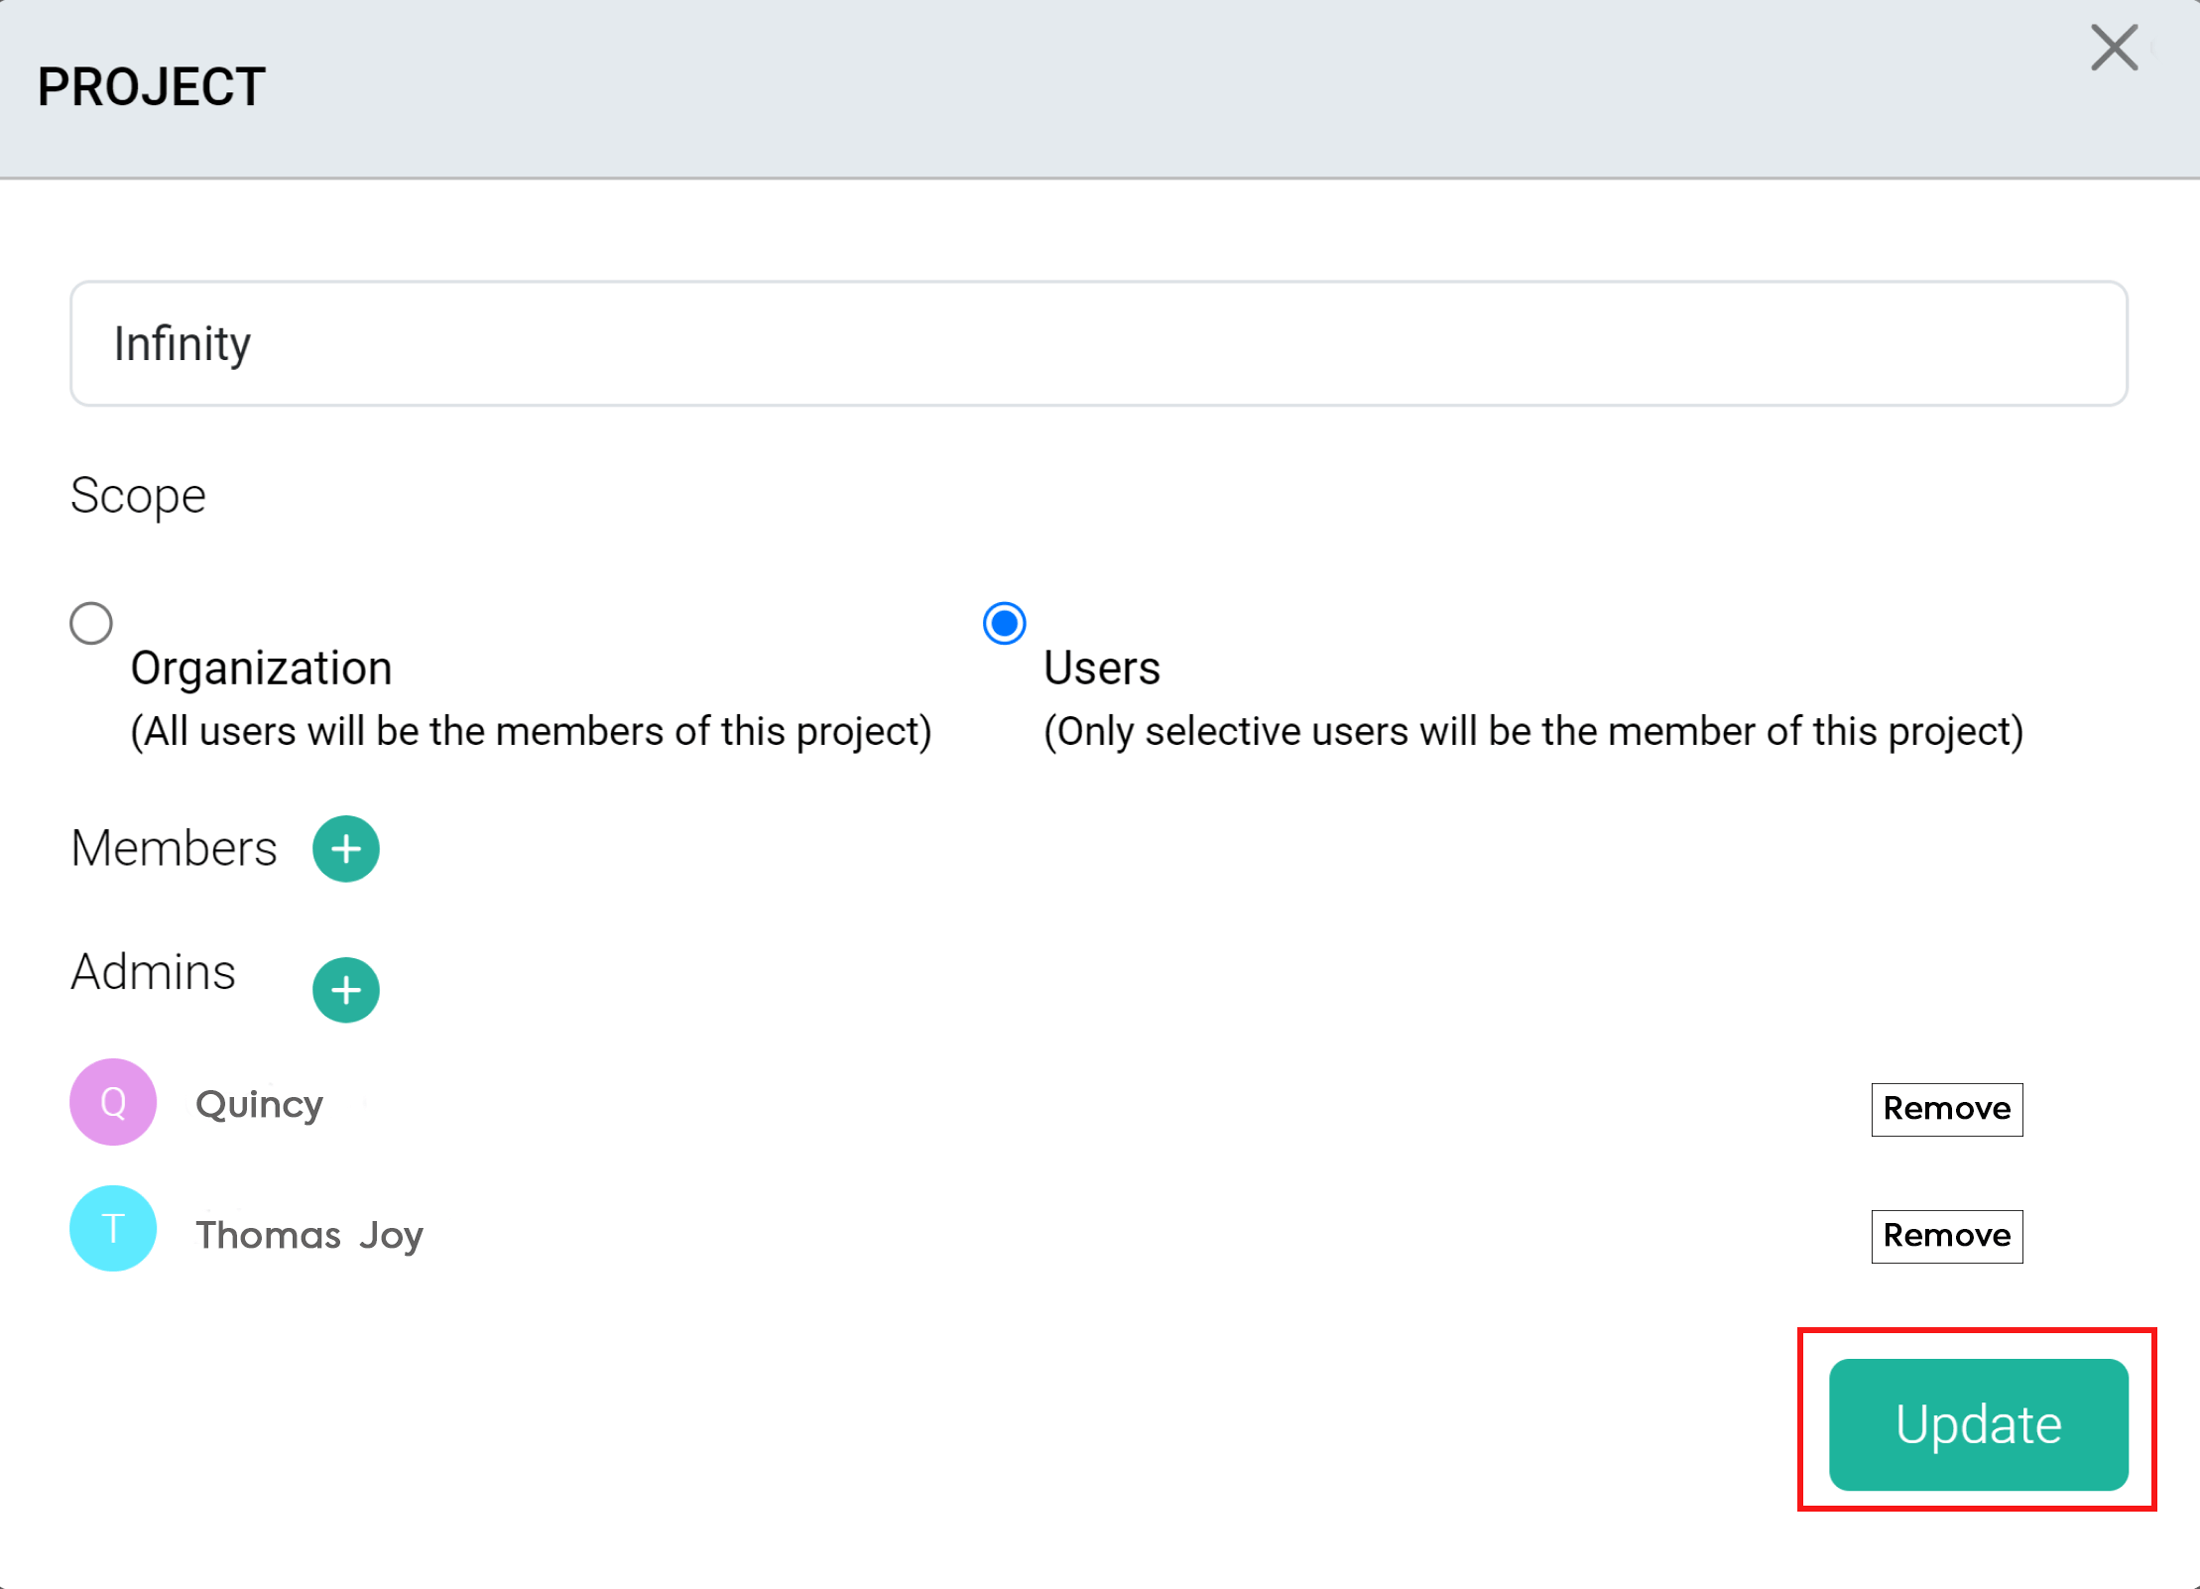
Step 1: Open the “Projects and Tasks” page and select the project you want to edit. Click on the first icon in the 'Actions' column labeled "Details" (upon hovering) to edit project information.

Step 2: Edit the information and click ‘Update’ to save your changes
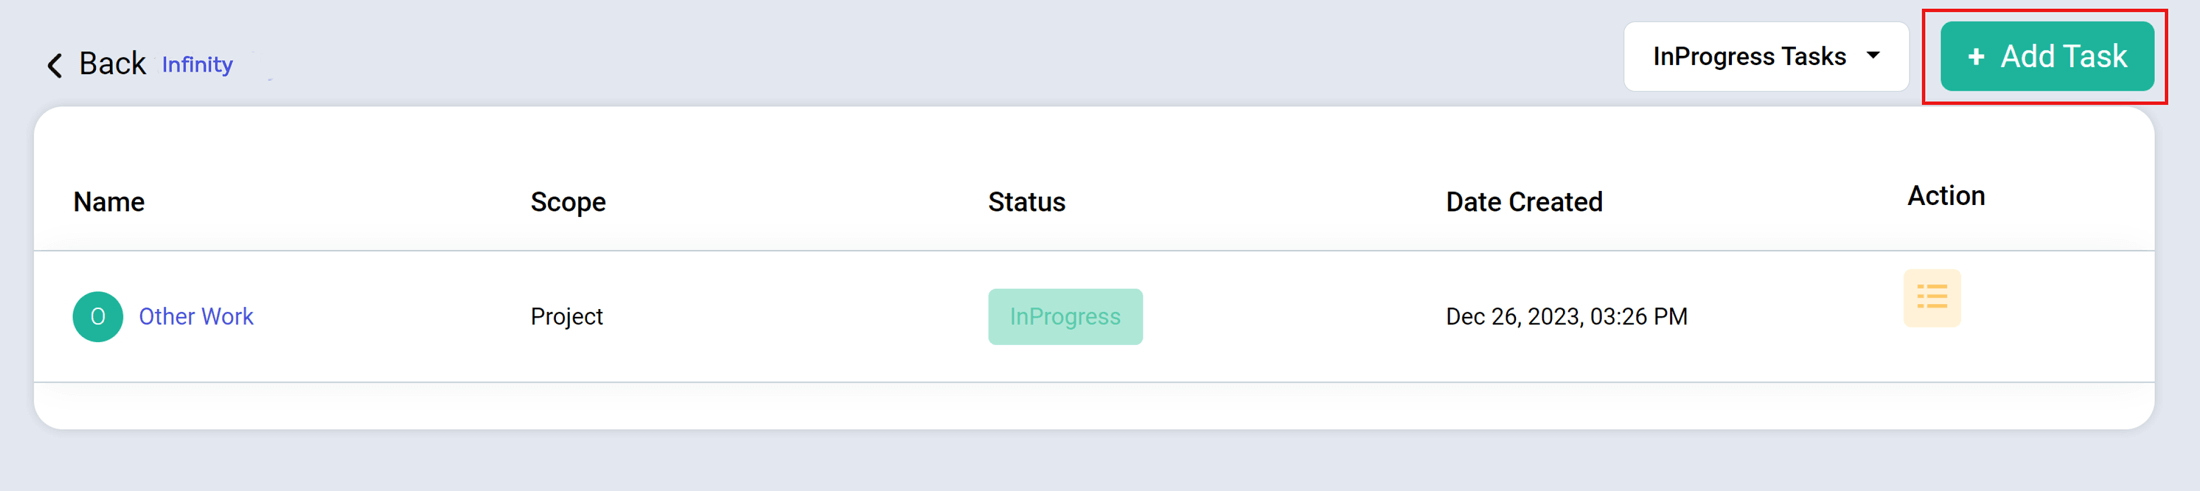
Step 1: Open “Projects and Tasks.” Under the “Actions” column, click on the paper icon, which, when hovered, says 'Tasks.'
Step 2: It will open a window where you can see all the tasks of the selected project.
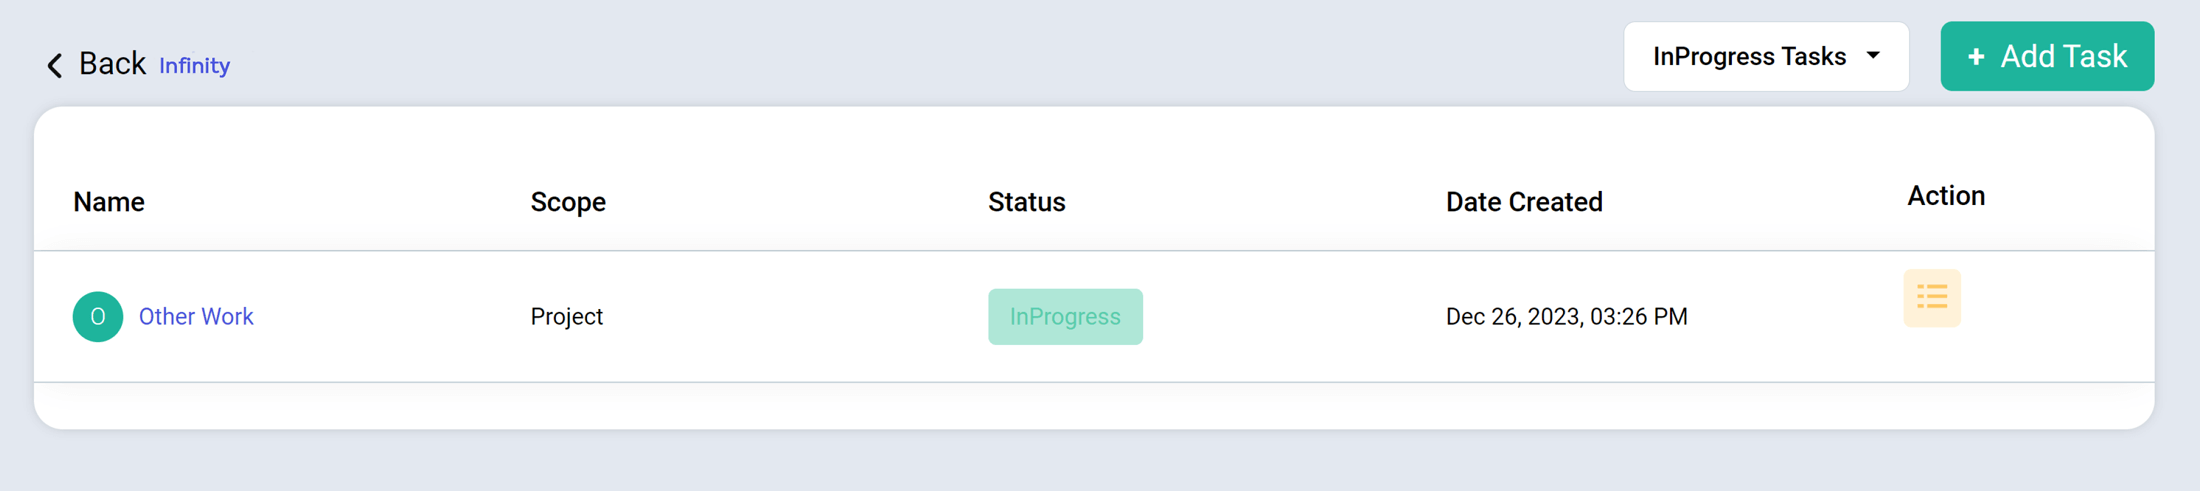
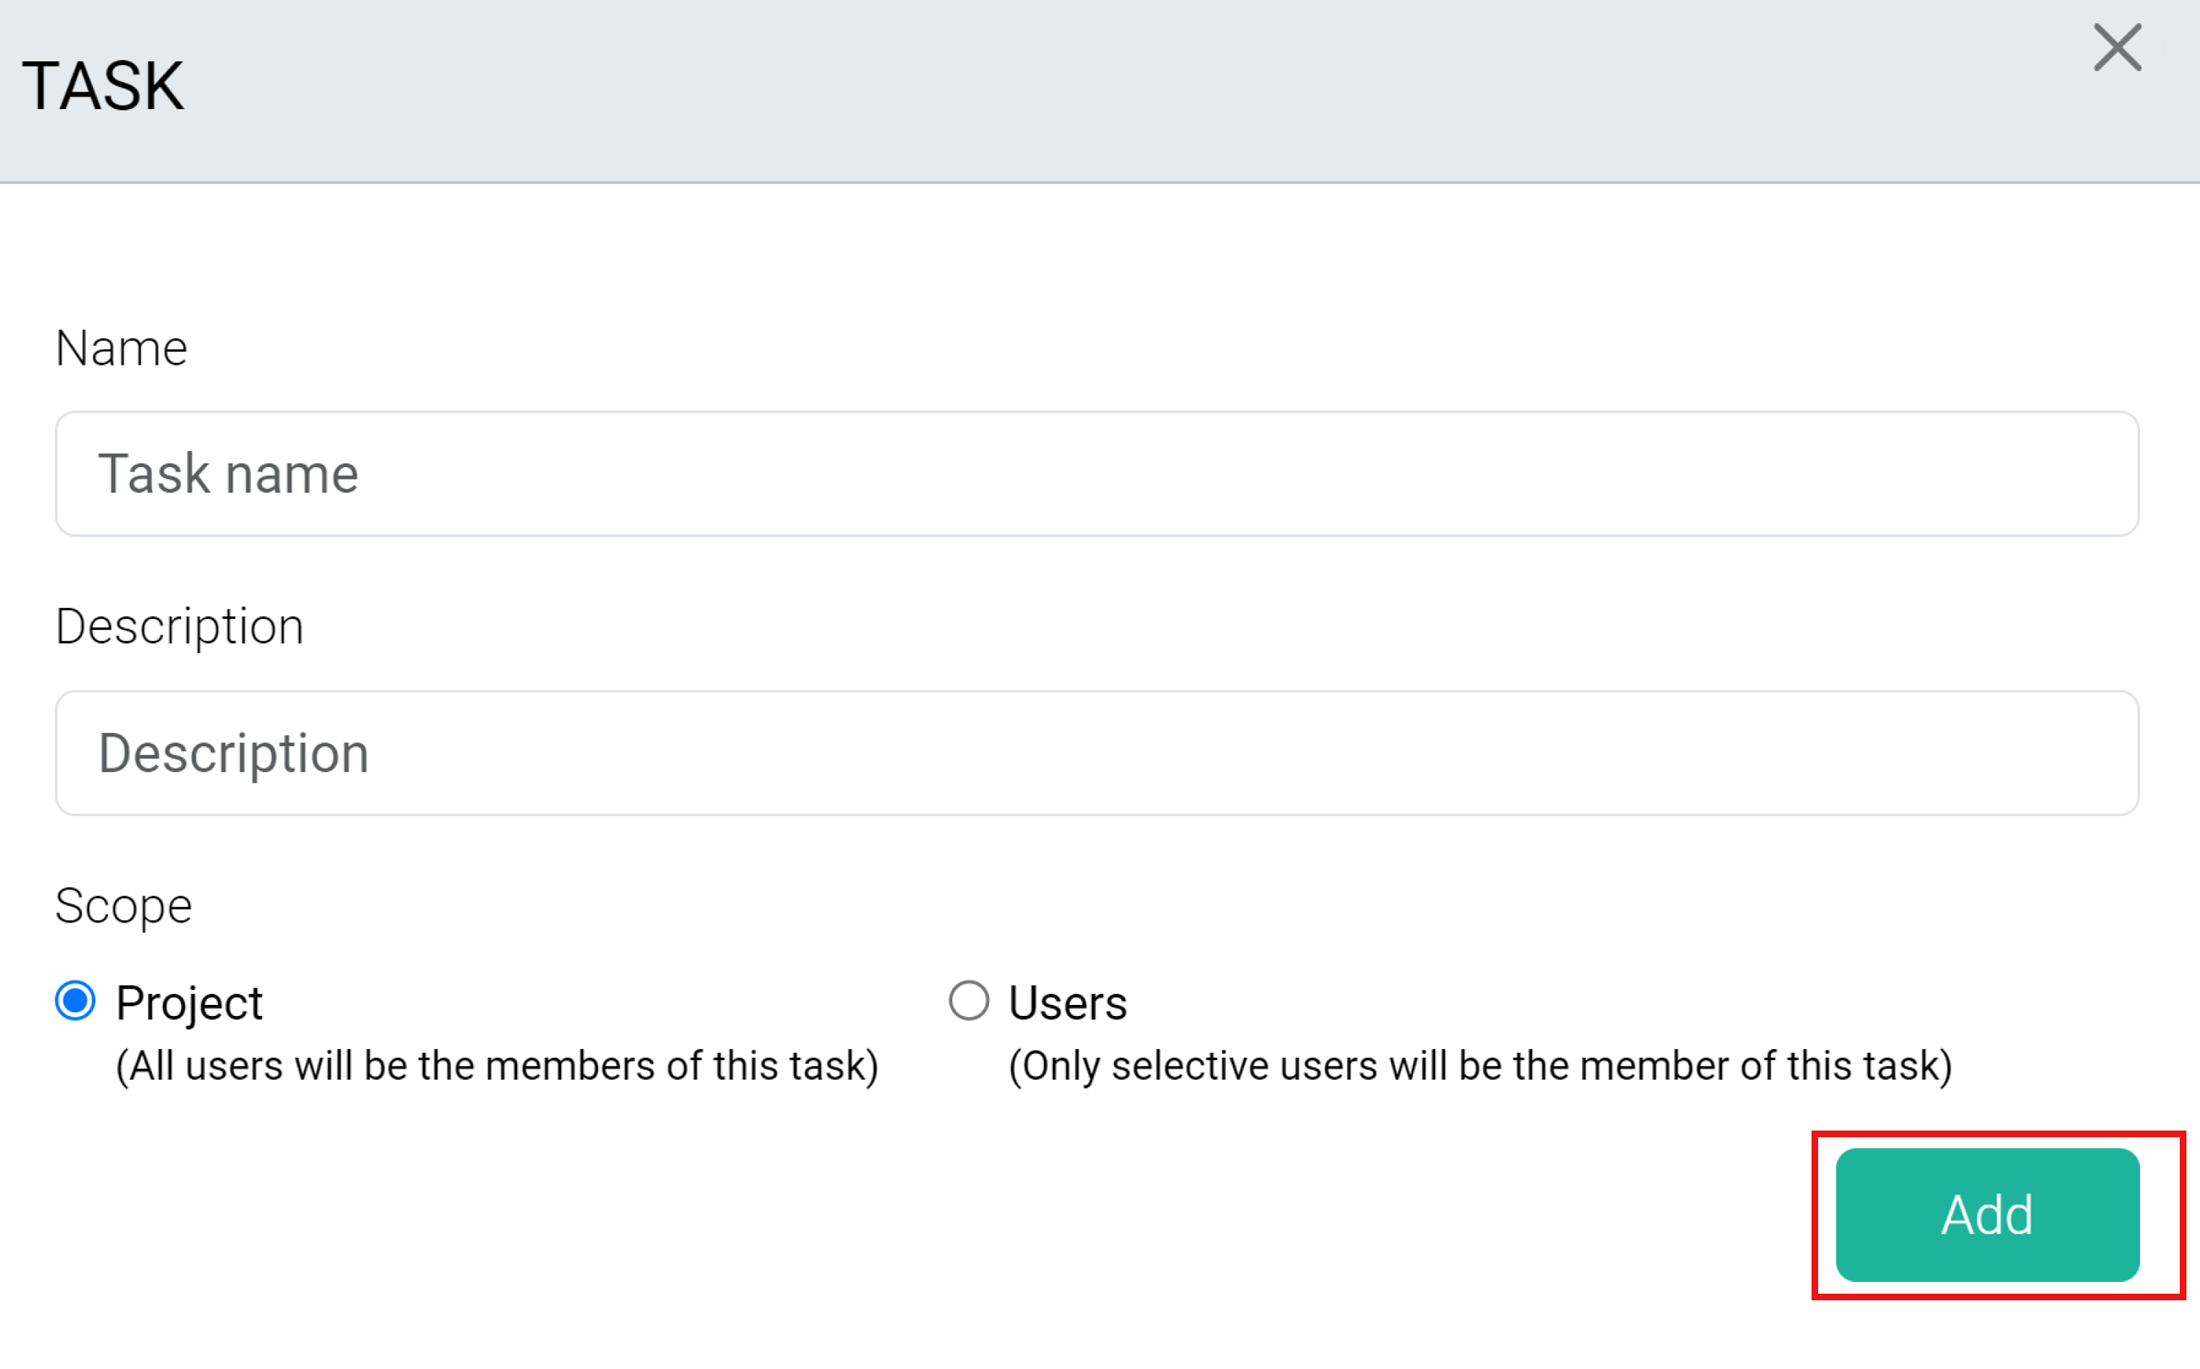
Step 3: If you want to create a new task, click on “Add Task.”
Step 4: Next, add the details and select the option between project and users. If you want to delegate it to a particular user, type in their name.
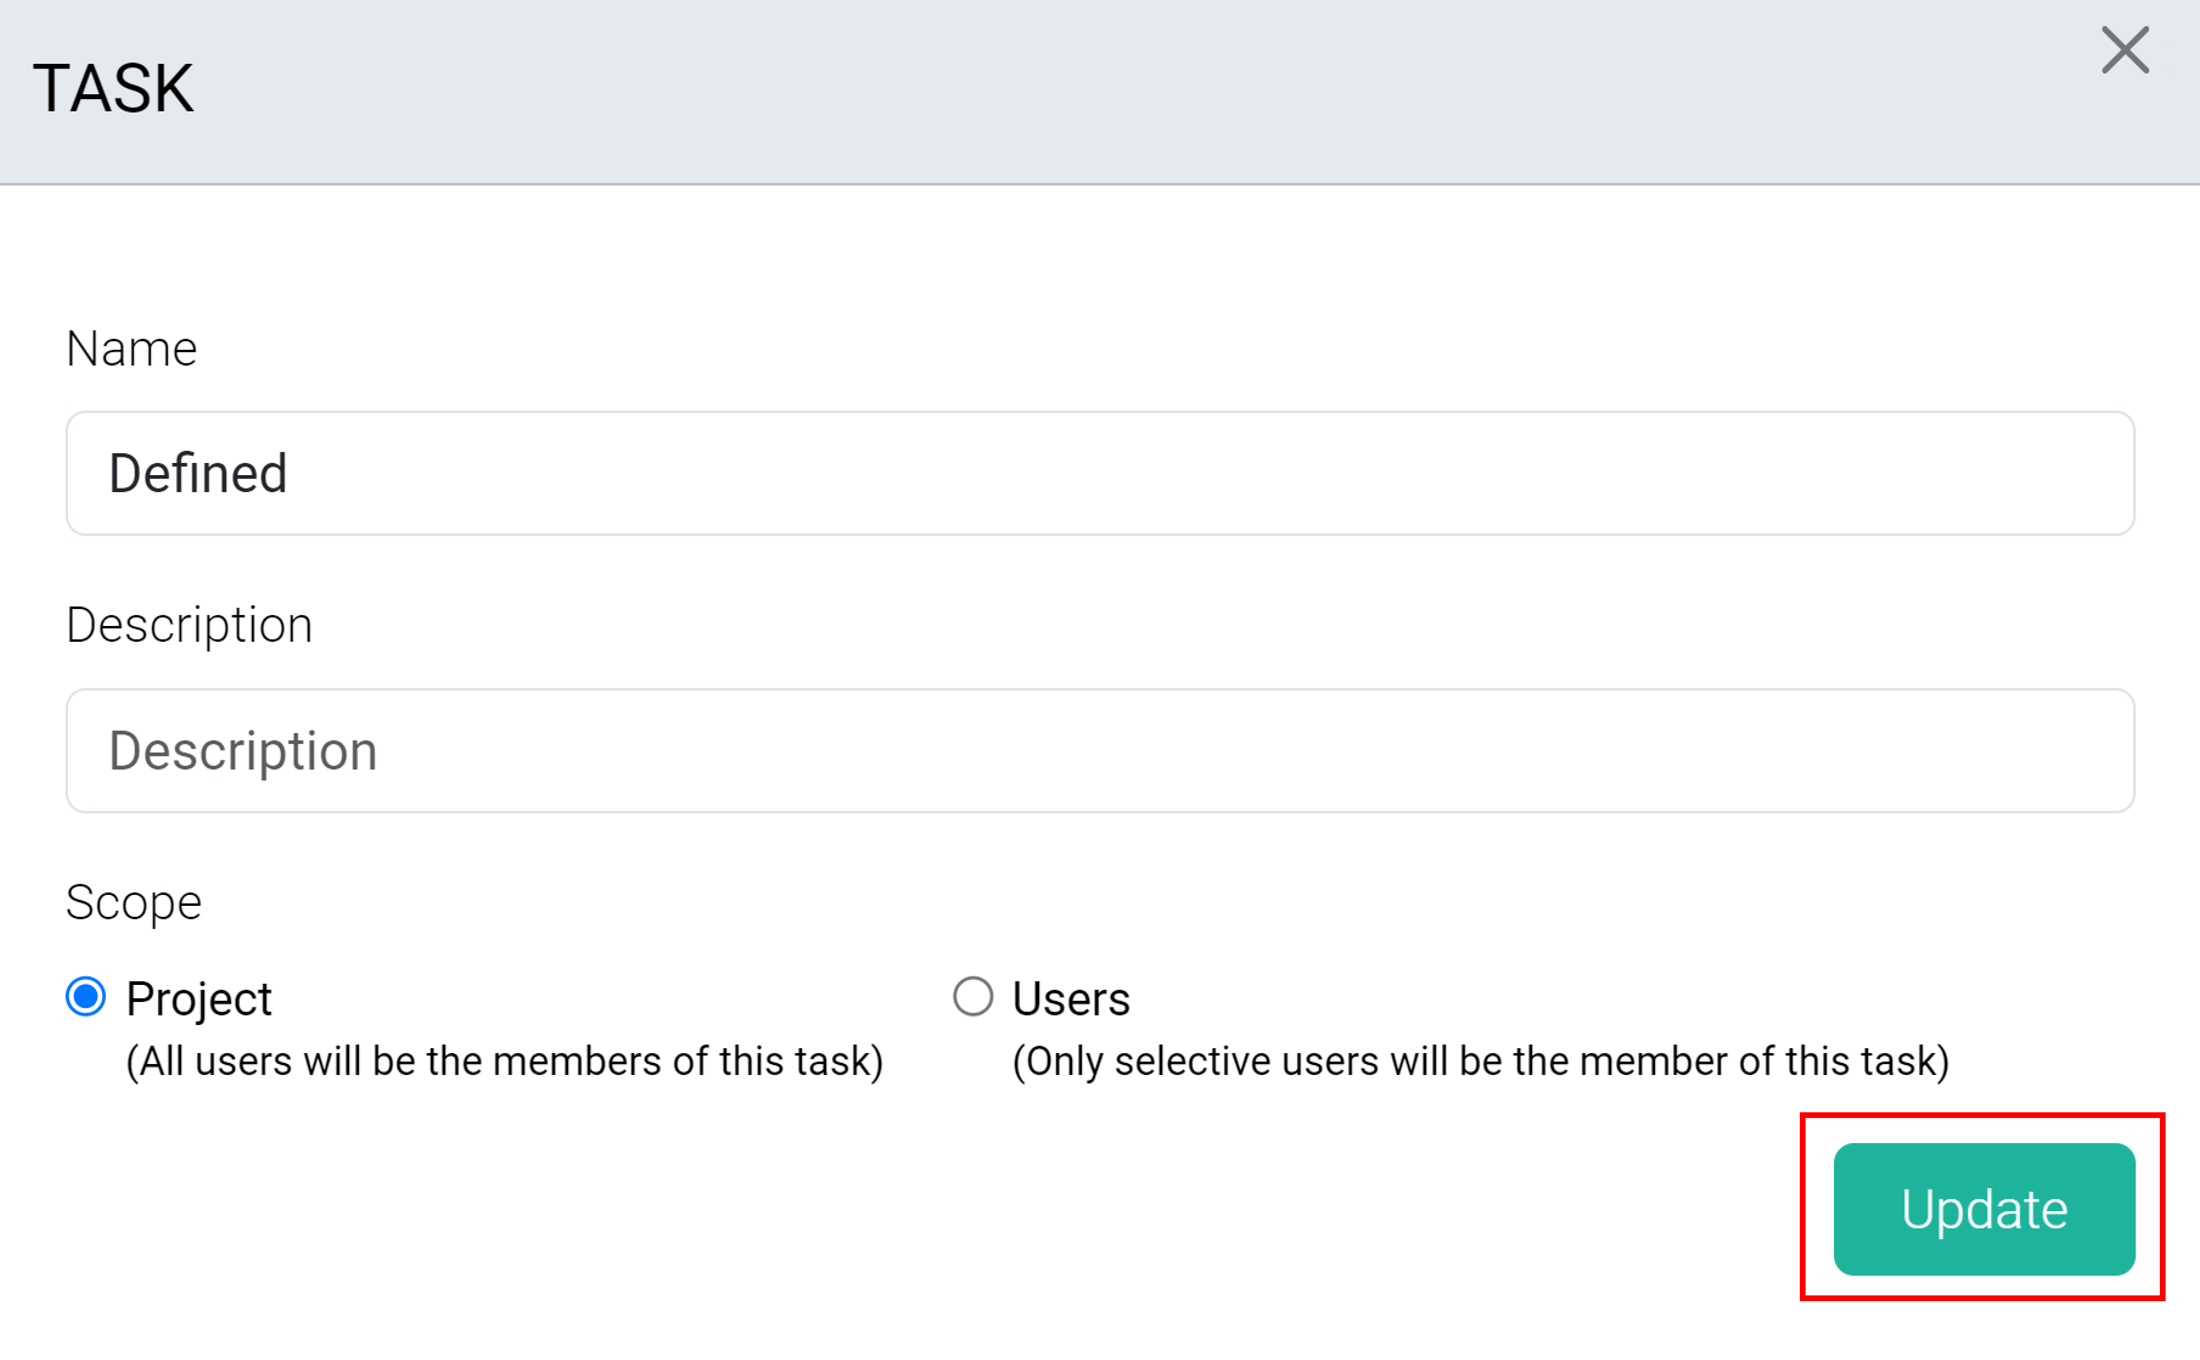
Step 5: To edit tasks, click on the details button next to each task and update the information.
Open the “Projects and Tasks” page and select the project you want to edit. Click on the second icon in the “Actions” column, which, when hovered, says “Details” to edit project information.
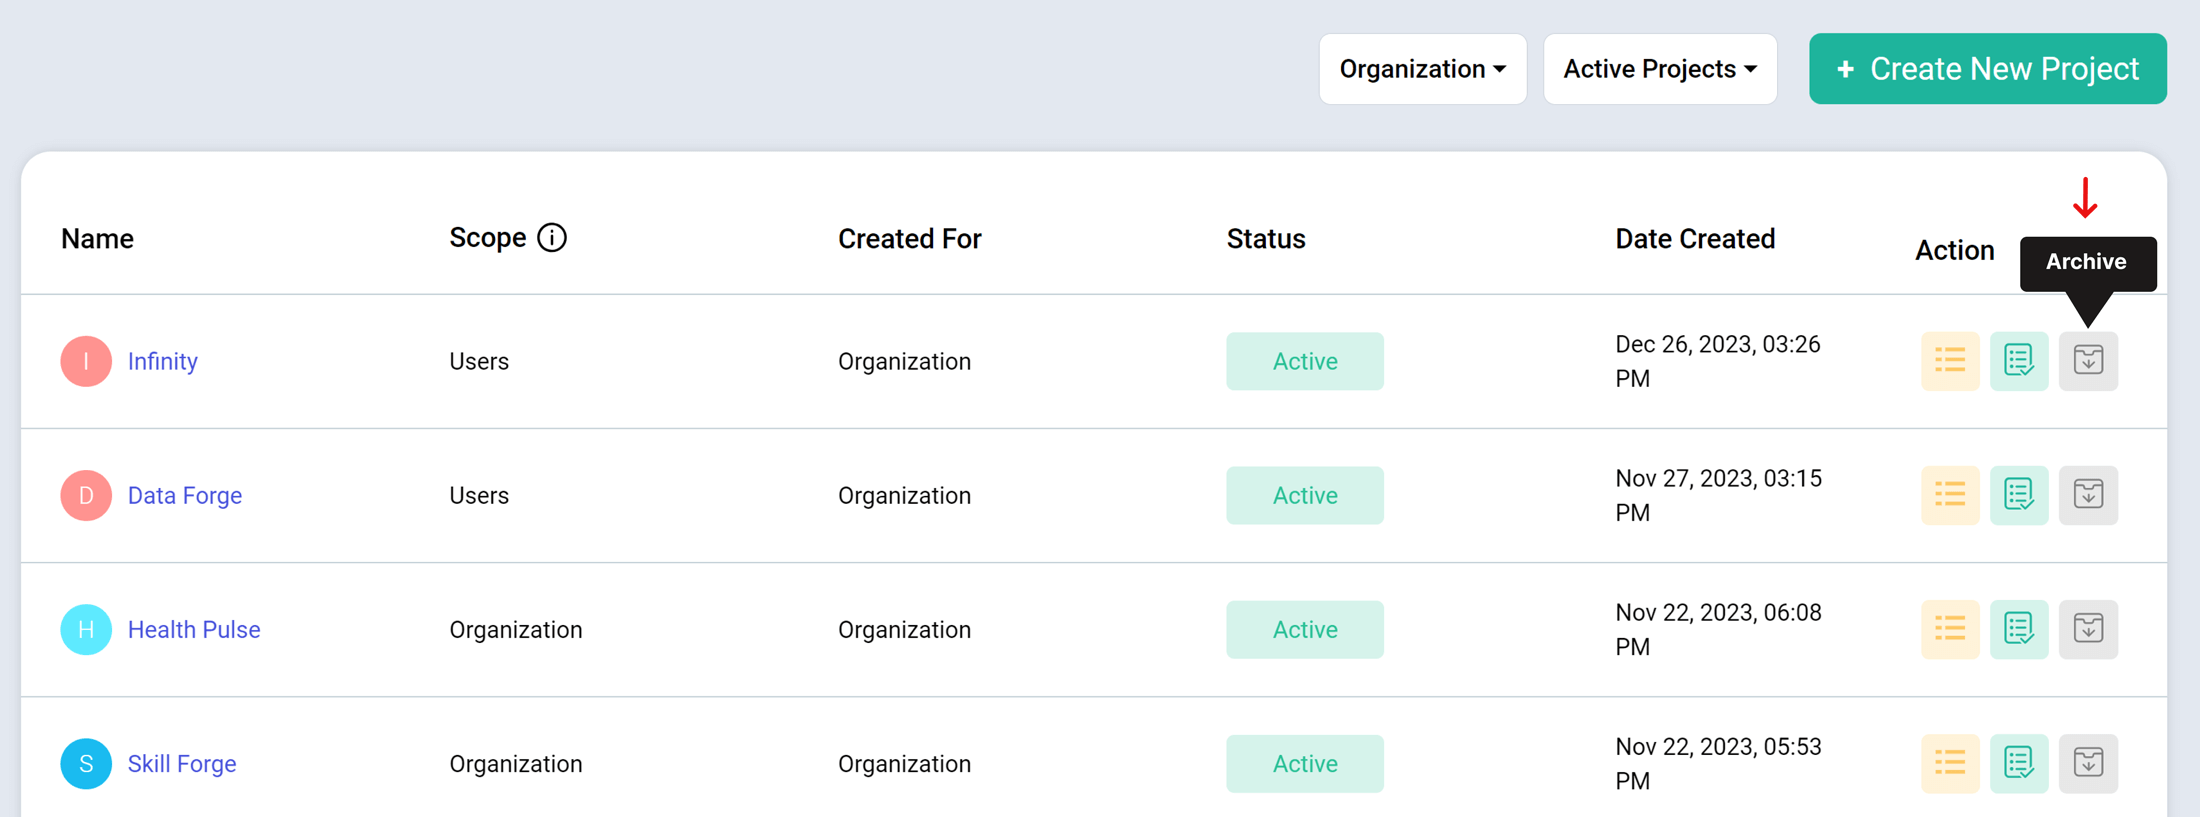
Use the filter beside the “Create New Project” button on the “Projects and Tasks” page.
Only the project manager you assign for projects or the admin can add, edit, and archive projects. Users with assigned projects can only view the projects allocated to them.
Try it free for 14 days and see how it can be your savior!
